March 2019
Those of us of a certain age (and beyond) may remember seeing the big old Armstrong Whitworth Argosies sitting on the tarmac at Essendon Airport. They were purpose designed freighters with a pod fuselage based on the idea that if you could open them at both ends it would be quicker and easier to unload and load them. (This fad has since passed and all freighters these days are either civil versions of military cargo planes of civil airliners converted to carry freight.)
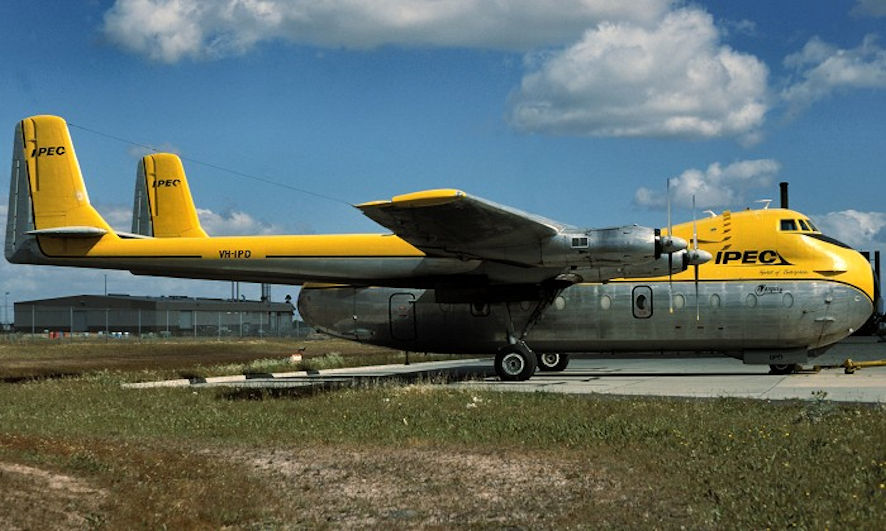
Just about the only air route in Australia on which air freight was profitable for airlines was across Bass Strait from Essendon to several airports in Tasmania. At one time there were three freight airlines flying this route but it didn’t last long, partly because the competition drove down prices and sent two of those carriers broke, and partly because the major domestic airlines could carry a lot of freight in the holds of their 727s and DC-9s. One of the companies to go under was Brain and Brown, which imported an Argosy for the service, registered VH-BBA. However, the more well financed IPEC drove Brain and Brown out of business and then bought that carrier’s Argosy, which ended up flying in IPEC colours.
For some years now I’ve been badgering poor Peter of Hawkeye about decals for an IPEC Armstrong Whitworth Argosy. Every year when I’ve gone to Expo I head first for Peter’s stand and ask him when the Argosy decals will be ready. Every year so far he has replied ‘Soon’. However, the other day my years of badgering paid off when I got a phone call from Peter saying that the IPEC decal sheets were almost ready, being printed in 1/72 and 1/144, and would I like to try a set, gratis. I was unable to refuse his kind offer.
This left me in a quandry. I have acquired two kits of the Argosy in 1/144, the Welsh Models resin kit and the Mikr Mir injection moulded kit. Neither of these was cheap, but then I suppose that kit manufacturers are liable to make more money from Bf109s and P-51s than from kits of lumbering old cargo planes, so the law of demand and supply kicks in, and we should count ourselves lucky to have even these two options.
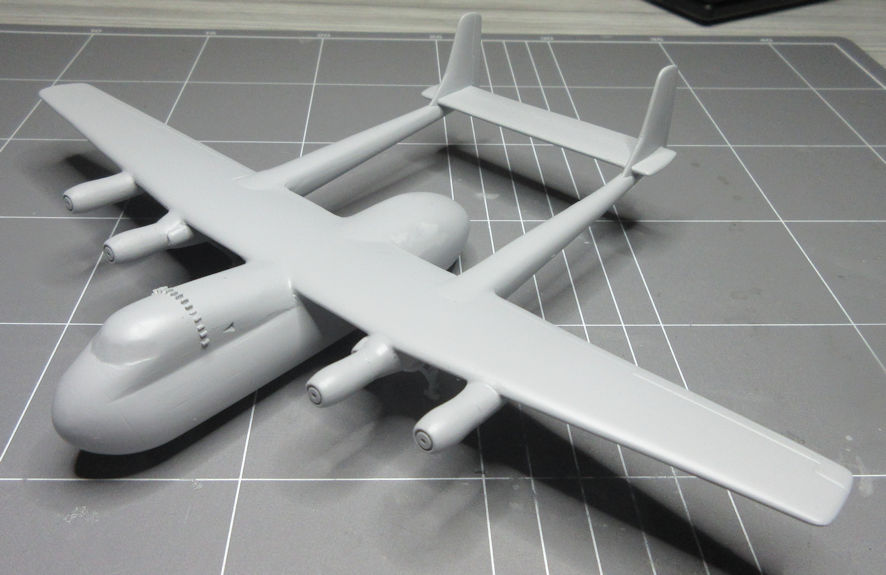
The imminent arrival of new Hawkeye decals for the IPEC Argosy forced me to make a decision; which kit I would use. The obvious choice is the Mirk Mir kit which is a magnificently engineered thing with a detailed cockpit (for 1/144), a full interior of the freight deck, tiny little transparencies for the windows and detailed undercarriage bays. The molding is very crisp and the kit comes with masks for all the transparent parts, a nice little set of etch details and a decal sheet for quite a few different civil options.
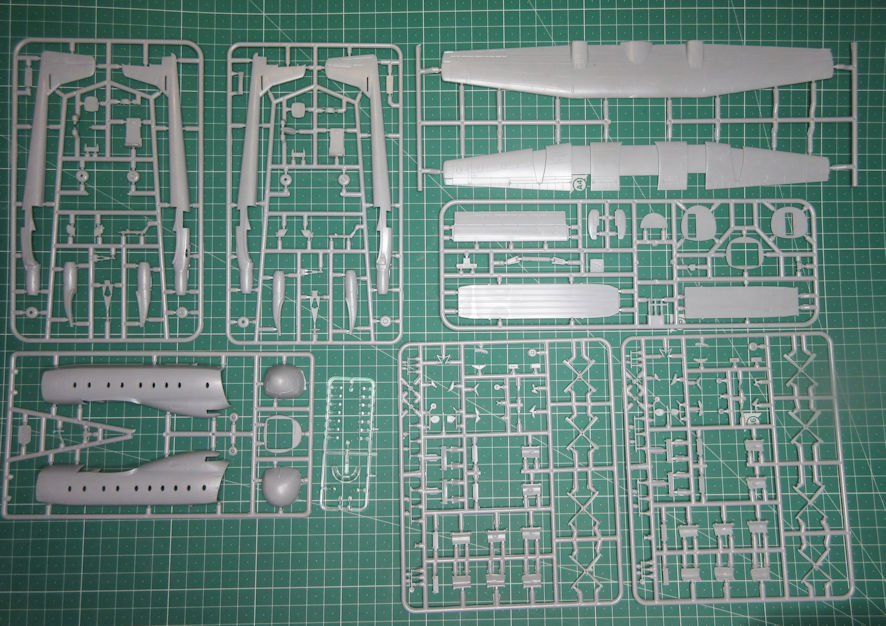
On the other hand, the Welsh Models kit is simplicity itself with the major airframe comprising only six parts including nicely detailed wings and nacels moulded in one part and the two tail booms and horizontal stabalizer moulded in one part. For all that simplicity, the molding itself is very fine and precise. There might a couple of little details that could do with some defining, but nothing serious. However, there is no liglhtly engraved surface detail, no windows and none of that lovely interior detail that the Mirk Mir kit has.
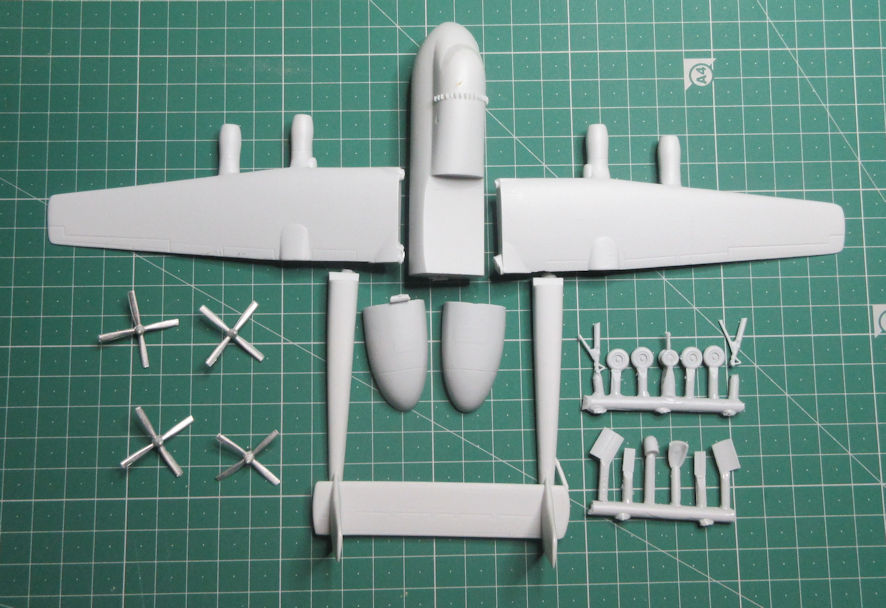
On the other hand again (modellers could often do with at least three hands) the engine nacels on the Mirk Mir kit are split right down the middle and getting the leading edges on the air intakes around the propellers on them to come out looking good would be a real test of skills. The propeller blades do not look particularly realistic and do not look very robust, and I’m not a builder of interiors on such small models.
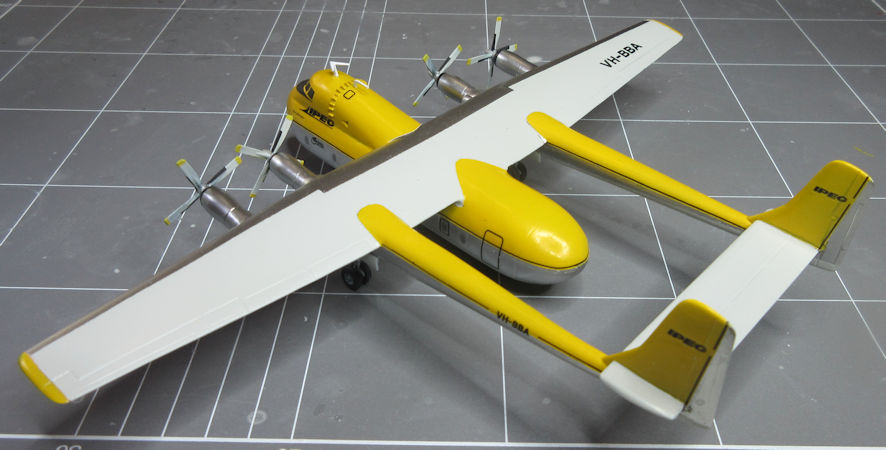
More importantly, as I often like to misquote from some long forgotten movie, ‘A modeller’s got to know his limitations.’ My limitations do not run to tiny little windows and, while the prominent vanes around the top of the fuselage may be a little over scale on the Welsh Models Argosy, I know that I would make a complete hash of trying to apply all those tiny little etched metal vanes with the necessary precision and, just as importantly, not knock them off during the modelling process. I’m sure that somebody out there has made an absolutely outstanding model of an Argosy from the Mirk Mir kit, but I know deep down that I don’t have the skills to achieve that level of outstandingness. In the end I decided that I had less chance of making a mess of the Welsh Models kit, and that’s what I decided to make. Besides, the Welsh Models kit is for a -100 series Argosy and the Mikr Mir kit is for a -200 series, but since VH-BBA was a 100 Series I decided to go that way.
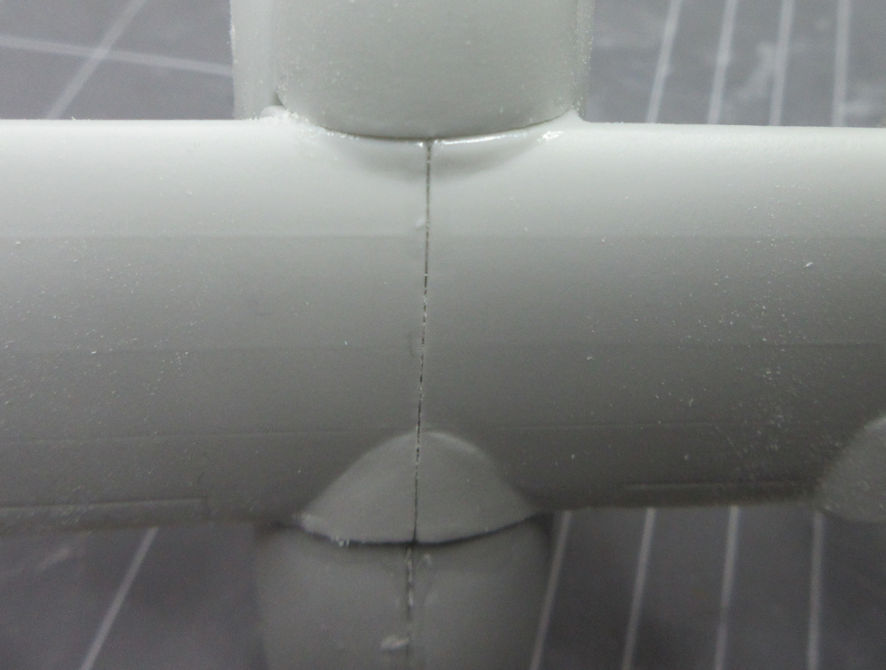
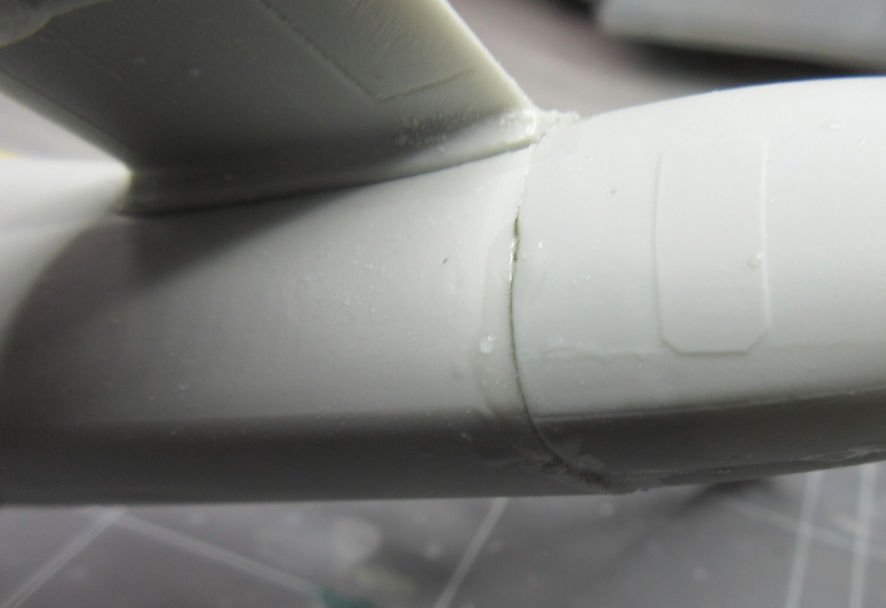
The Welsh Models kit proved a real bugger to make, even with its few parts. Mainly the problem was that the wings, the fuselage and the booms and tail were all different sized where they joined up. Only a millimeter or so, but that’s a significant difference in 1/144. Already I was beginning to think that I may have made the wrong decision.
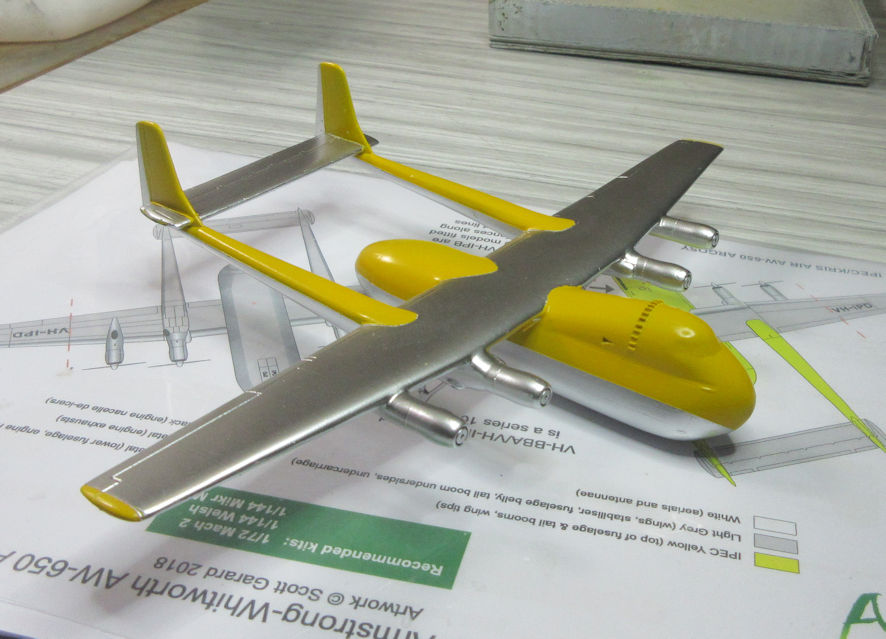
Having overcome those problems, and with the Hawkeye decals in my hand, it was time to get on with painting the model and applying the decals. By this stage I was disspirited. It turned out that the yellow I planned to use was too deep in shade after three coats are applied even though it looked just right when I applied one coat over a white base. It also seemed to me that the tail pylons were a little too low on the wings so that the yellow did not come down as far on them as it does on the real things. After contemplating this problem, and facing the problem of sanding back this yellow, doing all the remasking and finding a better yellow, I decided to press on with things as they were, muttering to myself that most people wouldn’t know the difference and I’ll probably forget about it too, I hope.
The issue of the pylons sent me back to the Mikr Mir kit which I had decided to put aside in favour of the Welsh Models kit which was, by this time, not looking like the best choice. One of the most difficult problems I’d had with the Welsh Models kit was in achieving the right angle where the wings and pylons met, and this was built into the Mikr Mir kit. (Fortunately for me, the angle of that junction built into the Mikr Mir kit was about the same as I’d achieved with the Welsh Models kit.) It also occurred to me that the best solution would have been to use parts from both kits, in particular the Darts and the upper fuselage of the Welsh Models kit. By then, however, it was too late.

The first test of the Hawkeye decal sheet was the thin black lines that run along the fuselage and pylon sides. This is nerve wracking process requiring a great deal of patience, very steady hands and a lot of very harsh language. I imagine that this project will be a lot less nerve wracking for those making the 1/72 kit than this 1/144 one and this might be a reason for making an Argosy using the Mach 2 kit (but don’t quote me on that). As I’ve already noted, the pylons on the Welsh Models kit are not quite as they should be so while the length of the decals is right-on they are a couple of millimeters too high where they come up under the tail planes. This is easily solved with a sharp blade. Similarly, the decals that go on the fins are a couple of mm too long for this kit, again easily solved.
I should note that, as usual, I gave your decal sheet a coat of Tamiya clear varnish before using them, to give them the gloss needed to match the surfaces they were to be applied to and to give them a little extra strength. This proved most useful, I think, in all the decal pushing around necessary to get the black line decals to go where they should. However, before giving the decals that clear varnish I cut out the decals for the anti-dazzle panel and radome and gave them a coat of matt varnish.
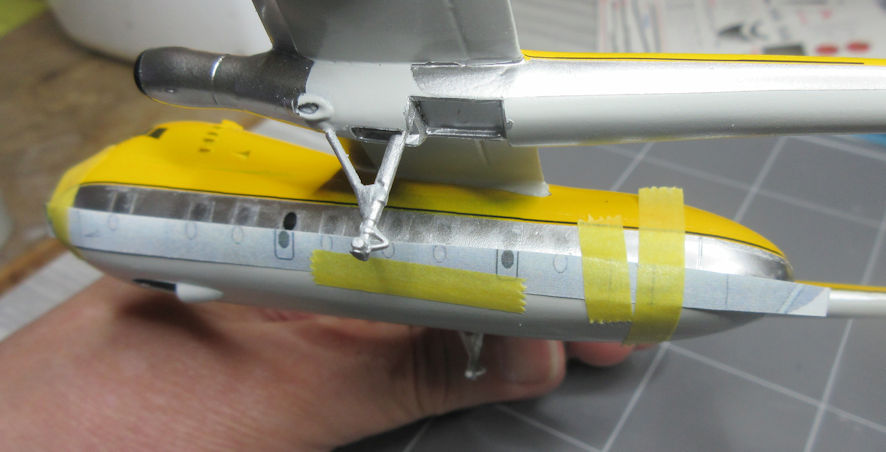
Having spent about three hours on that, I gave the decals a dose of Micro Sol and retired for the night. They looked pretty good the next morning when I started applying the window decals. To give myself a guide about where to place the windows I scanned the instruction sheet and reduced it to the size of this model (88 percent as it turned out) and stuck it onto the model as a guide to where the place the decals. I also used it as a guide to placing the rear door. Again, this is fiddly work, but I think the end result looks pretty good. Unfortunately, the instruction sheet did not include a drawing for the location of the windows on the other side of the fuselage. Using some kind of logic known only to modellers, I thought that the windows would be the same on the other side of the fuselage so I printed out a flipped image and used that as a guide. Later I discovered my logic was flawed and windows were not the same on both sides of the real thing, even though they are on my model.
After that, everything went reasonably well. The decal sheet, when it is released, will be a good one. I pointed out some problems with the instruction sheet, but they won’t effect the decals themselves. But, as with all models I expect, when you’ve finished it you know where all the faults and problems are, and the parts that would be better with just a touch more work. Here, however, poor memory and poor eyesight are a boon and this model looks very nice to me a few weeks later.
Leigh Edmonds little box of stuff
Writing history – making scale models – other stuff
