(October 2017)
I’ve just about reached the end of the odyssey of making a whole lot of Boeing airliners and the only major impediment to completing this set remained some Boeing 707s.

There are three basic kits you can use to make 707 models if you don’t count the Welsh Models vacform kits – which I didn’t use but might have done better with if I had. There is the ancient Airfix kit that has recently been reissued, which I didn’t look at because they weren’t available when I started on this part of the project, a Minicraft kit of the late model 707s and a Roden kit of the early model ones.
Let’s start with the Minicraft kit which is not one I would recommend, but that’s what there is so I used it. The kit comes in a variety of versions with two different wing platforms – one for -300 and -420 series 707s and the other for -320 series ones. The kits also come with three versions of engines, Pratt & Whitney JT3C and JT3D and Rolls Royce Conway engines. The truly dreadful part of some of these kits is the JT3D engines which are so terrible (to my eyes anyhow) that throwing them in the bin is too good for them.

It was imperative that I made a Qantas 707-338C, which is part of the -320 series so I managed to get by trading a set of Contrails JT3D engines which made the model presentable. I had also hoped to make the RAAF version of the -338C but could not find another set of the aftermarket engines anywhere around the world so I had to abandon that idea.
I also planned to make a -420 series 707 with the earlier style wings and Conway engines and picked up a kit nice and cheap at the Expo swap n sell. However, when I opened the box I found that some rotten mongrel had already nicked the Conway engines but I managed to make something that looks a bit like Conways by working on some left over JT3C engines. (They are nicely hidden under the wings so you can’t easily see the real problem areas.)

Having got the easy work out of the way we move on to the more challenging -100 series models which are all made from the Roden kit. This kit comes in two versions, a Boeing 720 and a Boeing 720B. The 720 was really another 707 version but the airline that ordered them wanted something to differentiate it from other airlines so it got called the Boeing 720. The difference between the two kits is that the 720 kit has JT3C engines and the 720B has JT3D. The JT3C was a pure jet engine and the JT3D was an early turbofan engine with ducting at the front of the engine which makes it difficult to mistake the two different engines. Reviews of the Roden kit have complained that the JT3C engines are the wrong size and I tend to agree, so replacements had to be found. The kit JT3Ds looked alright to me and so I used them.

There were a lot of complex differences between various 707s and if you want the full details you can find them at the website ‘Ultimate Boeing 707 Guide’ at Airlinercafe.com. But here is the executive summary. The difference between the original -100/-120 series and the -100B/120B series is that a 100B/120B is a -100/120 with the JT3C so it got called a Boeing 720. The difference between the two kits is that the 720 kit has JT3C engines replaced by JT3D engines, a wing glove fitted inboard of the engines to give the leading edge a kink and a taller tail fin.

The first batch of 707s that Qantas ordered were -100 series modified to suit the airline’s needs, called -138s. The second batch were -138Bs and all the original -138s were converted to -138B standard very quickly because the JT3Ds were more powerful, more fuel efficient and quieter. I gather that most other -100/-120 series 707s were also similarly converted.
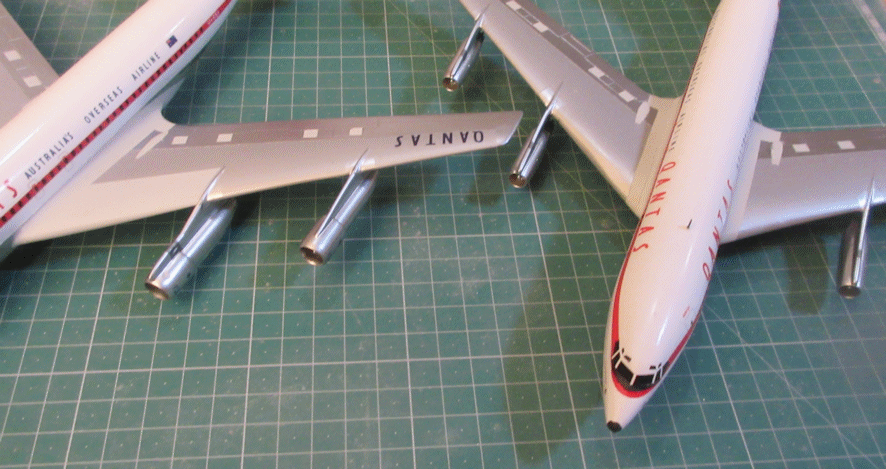
The thing that made Qantas early 707s different from other early model 707s was their length. Early 707s were designed to fly routes across the continental US and across the Atlantic but Qantas needed them to fly the longer trans-Pacific route on which some of the runways were limited by reducing the fuselage length, makine the 707-138 a unique version.
Having figured all this out we’re almost ready to start making some early model 707s. But wait! While the Boeing 720 was part of the 707 family it also had differences for other 707s. For example, while it might have the JT3C engines or the -100/-120 series or the JT3D engines of the later version it had the wing gloves of the -100B/-120Bs. It also had the taller or shorter tail fin depending on the version. To complicate matters it’s fuselage was shorter than that of the standard -100/-120 with plugs taken out of the fuselage fore and aft of the wings. But while a Boeing 720 was shorter than a 702-100/120 it was still longer than a Qantas 707-138. (The precise differences in length – counted in windows – is given in that website article.)


Before we get going with actually making any models the other thing to note is that some engines have pylons that extend all the way to the engine intake and others don’t, depending on the model. For example, all the early model 707s had pylons that extended to the intakes on all four engines and 720s had the extension only on the inboard engines.
The first one of these I made was a Boeing 720B, straight out of the box. In retrospect I wish that I had used afternarket engines instead of the kit ones. I’ve also liked those colorful Braniff schemes from the 1970s and hunted down some decals to make one. This is a delightful little kit to make and there are no serious difficulties. The kit is designed so it is easy to make either the version with the short or the taller fin though I didn’t see anything in the instructions telling the modeler of this possibility.

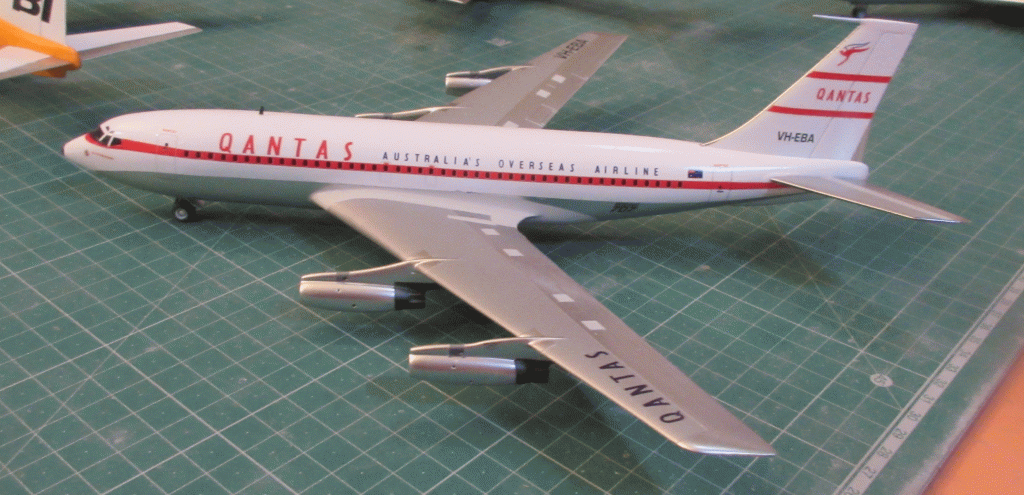
Next came one of the hard ones, the Qantas Boeing707-138 with the JT3C engines, the shorter fuselage and the straight leading edges. First the leading edges which involved packing the inside of the wings with filler before gluing them together and then attacking them with a razor saw, files and then wet-and-dry until something reasonable had been achieved. This was something achieved overnight
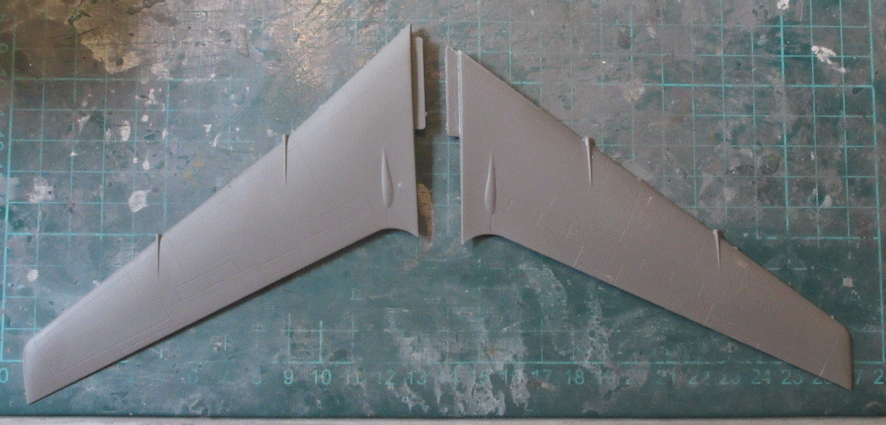
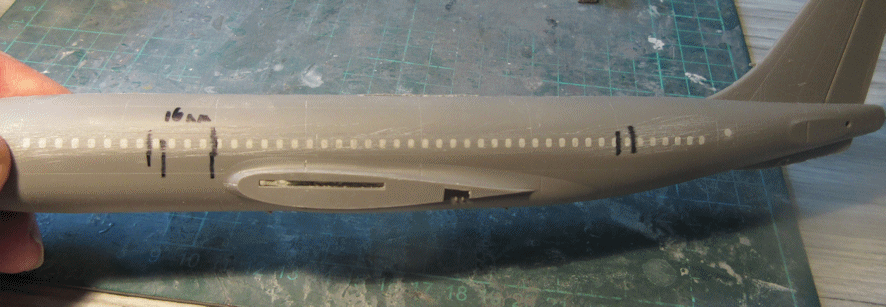

Then there was the fuselage which had to be shortened. I used the measurements suggested in the website article as a guide and very carefully marked and then made the incisions. You will notice that the fillet of the wings are also molded with the fuselage and these had to be cut and filed away too.
After all the cutting and hacking the whole lot had to be stuck together again, as accurately as possible.
Having got that part of the project completed we then moved on to the engines. Not only were the kit ones too fat, they were for a 720 rather than a 707 and so I had to get some aftermarket ones. The trouble there was that all the aftermarket engine kits were for 720s as well, with that problem of the outer engines lacking the pylon extensions out to the intakes. The only solution to this problem was to buy two sets and throw away the unwanted bits.

With all the parts in place, and that took a lot of juggling, I had to smooth out all the rough edges, doing what seemed like endless filling and sanding to hide all the plastic and resin surgery that had taken place.

As usual for almost any Australian airliner, the decals came from Hawkeye. A few months after completing this model the kink in the outer pylons sticks out badly, they shouldn’t be there but if I was to correct that little fault I’d have to repaint the entire model, and I’m not that much of a masochist – at this moment anyhow.
After the -138 the Qantas -138B was simplicity itself and involved simply shortening the fuselage. After much internal conflict (of which more later) I decided to use the kit engines for a JT3D as being ‘not too bad’. Again, the decals came from Hawkeye.

After I’d done these two models I looked in my spares box and saw that I had some leftover fuselage plugs just right for making more early model 707s. At about the same time I came across the Vintage Flyer decal for one of those lovely highly polished 707-120s which, being American Airlines, is a Boeing 707-123. There was a difficulty however, in that Authentic Airliners had sold out of their JT3C engines so I had to use ones made by Welsh Models instead. Again, the set is made for a 720 rather than a 707 so I had to buy two sets and discard the unuseful parts. The trouble with these was that while the Authentic Airliners engines had been made to be used on the Roden kit the Welsh Models ones had been made to fit onto their vacform and resin kit. This meant that the pylons were not right for the kit I was using, leading to a lot of additional work in getting them to fit, but at least this time I managed to avoid the kink that mars the -138 model

Again I had to remove the wing gloves as I had for the 707-138 but this time, after I’d made the cuts in the fuselages I put into the gaps some of the spare fuselage plugs that I had left over from the -138 models.
The rest of the construction was fairly straight forward although trying to replicate the original polished appearance of a real American 707-123 is almost impossible.

One final note, about scale model engines – you will have noticed that I’ve been almost obsessional about this during this project.
The problem is that nobody seems to agree on what they should look like and how big they should be. At one stage I got together all the different JT3C and JT3D engines I could find and lined them up to see which ones I preferred.

As I mentioned at the beginning of this article, the Minicraft JT3D is a puny little thing and hardly worth the name, so we get rid of that immediately. This leaves us with the JT3Ds on either side which are tolerably something like a JT3D should look like. The trouble is that I have not been able to find another set of Contrails JT3Ds anywhere despite trawling the interweb for them. The Roden ones would not be bad, but even I am not tempted to buy an entire airliner kit just to throw away the airliner and keep the engines.
I’ve already come to the conclusion that the kit JT3C is too big and needs to be replaced, and that Welsh Models is the only place where you can find aftermarket ones. As for that monster hushkited JT3D on the left, I tried to use them but they are just too big and the results of my struggles had to be consigned to the dustbin of history.
