November 2008
(Note. Since I wrote this I’ve given up the struggle and now only use Tamiya lacquers, either the rattle can TS range of the recent LP range, both of which are excellent.)
A tale of misery in several parts
It comes in little bottles that cost not quite as much as French perfume, but doesn’t smell as good either. It’s raison d’etre is to make the lives of modellers simpler and much happier. But for me it has been the cause of unspeakable angst. I speak, of course, of Alclad II.
If you are determined that you absolutely have to make models of aeroplanes that haven’t been painted then you have to face the problem of how to replicate them in scale. There have been many solutions to the problem over the years including good ol’ Humbrol 11, rub ‘n’ buff paste, bare metal film and, perhaps the most successful until recently, Metalizer. I’ve tried them all and they all fail to replicate that look of polished (or) unpolished aluminium. In truth, the simplest solution to the problem is not to make models that present this challenge, but some of us never learn.
Humbrol 11 is a lovely thing. It is cheap and easy to find, it goes on beautifully and it dries quickly without any problems. The trouble is that it makes the model look as though it has been sprayed with silver paint. This is just what you need if you are doing things like the RAAF Meteor which was, in fact, sprayed silver, but doesn’t look very realistic. Some years back I bought myself a tube of ‘Rub ‘n’ Buff’ which you spread over the model as a paste and then polish up to the required sheen. It doesn’t look too bad but I had trouble ensuring that the paste was the same thickness over the entire model, little protruding bits didn’t like the polishing process and decals weren’t too keen on the stuff either. I haven’t bought another tube since.
Bare metal film is alright in principle but actually applying it to a model is a cause for heartache, especially if you are using fine aluminium film that is to the stuck down using laquer because it goes everywhere, dries in some places and not others before the film is down properly, and if you manage to get some on the surface of the film the effect is ruined. Besides, I’m not convinced that this process looks very realistic – if there is such a thing as scale colour there is also something called scale sheen and metal film looks far too bright to me. You can get bare metal film with a tacky side but it looks too thick to me. The only thing to be said for using metal film is that the best supply comes wrapped around chocolate, and you need a lot of it to get a model covered properly.
Metalizer must have been around for 20 years, I’ve used it a lot and it’s not bad stuff. It is not too hard to find in the shops and it isn’t too expensive. You have to go through the process of making sure your model’s surface is absolutely perfect with no scratches or blemishes of any kind because the metallic finish highlights every little fault. It comes in little bottles ready to be sprayed, it has to be put on fairly thinly and it comes up looking nicely. If you want a really bright finish you can use the buffing Metalizer but then, of course, there is always the problem with those little bits that you always knock off during the process, and buffing Metalizer is a very fragile thing so you have to be careful in using it and handling the model. And it is a bugger to mask. The alternative is non-buffing Metalizer which is much tougher and does buff up a bit to give quite a satisfactory and realistic finish.
Then Alclad appeared, a metalic laquer that had most of the advantages of Metalizer without most of the problems. The trouble was that it disappeared from the market almost as soon as it arrived. A few years later we have Alclad II which is more or less the same product. Many people swear by it, but most of my swearing has been caused by it.
Having finally conquered white I decided it was time to attain mastery over bare metal. Some time earlier this year I embarked on making several models that would require bare metal treatment and invested in some bottles of Alclad II. That was when it all started to go down hill.
The Brabazon
What an amazing aeroplane. Having taken out a loan to buy the resin 1/144 kit of this monster I spent a lot of time working on the resin to being it up to scratch, which resulted in quite a few scratches. To overcome this I would give the model a coat of grey primer and hunt down all the flaws in the surface, filling, sanding and polishing. After about three or four goes the surface wasn’t bad but the sanding and polishing had opened up some of those bubbles you get in resin kits. Eventually that was solved but because I was going to used Polished Aluminium Alclad II on this model I had to apply a base coat of black laquer. However, it revealed flaws that the grey primer had not, and when they were all solved the first coat of Alcad II found even more. At each stage there was more sanding and polishing. Somewhere in this process bubbles began to appear in a couple of places on the surface that got worse with each coat. The solution was more sanding and polishing. By this stage the paint on the model must have been half an inch thick (I exaggerate) which was causing its own problems. So I sanded the whole lot back to resin and started again. This time things went much better apart from a strange bubbling on the port wing upper surface. I gave up and sanded and polished the offending patch back to resin and started again. The trouble is that that part of the model has a different sheen to the rest. By this time I had had enough and it was either throw the model in the bin or just live with it. I’m living, but I’m not smiling.

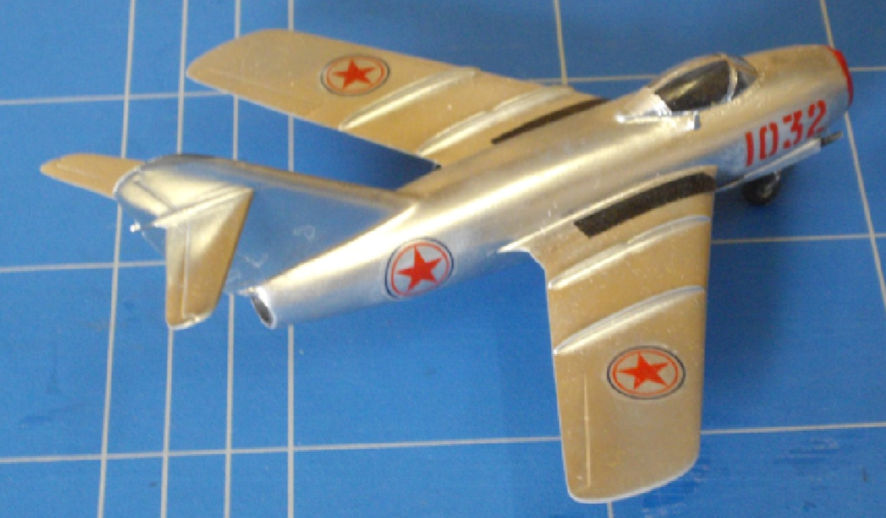
The MiG-15
During the process of making the Brabazon I thought I might try experimenting with something smaller to see what I was doing wrong. An old KP MiG-15 was close at hand so I had a go at it. This time I decided to forego the Polished Aluminium and tried another laquer called Airframe Aluminium, which did not need the black undercoat. On this model I experimented with different spaying pressures because if you use too high a pressure the thin laquer just runs all over the place and you can see where it has puddled before it dried in different densities. If you use too low a pressure the laquer seems to dry before it gets to the model. All this was giving me a headache and not getting anywhere. At that stage I went to Canberra for a week and a bit and when I came back to continue the experimentation everything worked well and the result looked almost useable. I have no idea what happened while I was away; perhaps the temperature or the air pressure. The end result is a bit mottled in places but after the week or two of torment before I went away I was prepared to live with it.
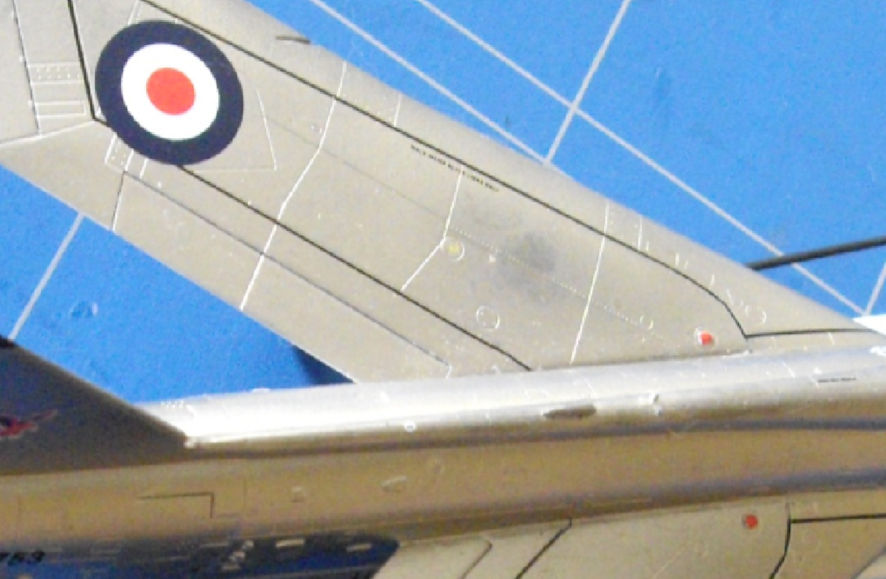
The Lightning F.6
With the Brabazon almost completed and the MiG-15 looking reasonable I decided to try my luck with my first Trumpetter Lightning. Most of the ones I plan to build will be bare metal so I have to get it right with them. Unfortunately, I decided to experiment with the shades of Alclad II that I would use because the Airframe Aluminium looked a bit too light. I cannot now recall which shade I started with but it was too dark. To lighten the look I put on a second coat of a lighter shade and, with the model still looking too dark, I went back to Airframe Aluminium. However the coats underneath effected the tone of the top coat which was still too dark. In desperation I decided to try a coat of Polished Aluminium on top of that. The result looked just right with just the right combination of sheen and depth to the colour. I would use it on all my Lightnings apart from one little problem, it is still tacky six weeks later. Being impatient I got on with the process of applying the decals anyhow, with the result that some of the tacky top coat stayed on my fingers rather than on the model. Oh well, off to the wailing wall again.

Leigh Edmonds little box of stuff
Writing history – making scale models – other stuff
