INDIANA EDMONDS AND THE WALL OF DOOM
(February 2013)
This is the first time I’ve been to an analyst in a few years. Do you still do things the same way, I lie on this couch and you sit over there taking notes? You do. Good. I’ll just lie down here, make myself comfortable and try to stop shaking.
Where to start. Perhaps it began when my parents gave me my first Airfix kit, a Hawker Hurricanr IVRP, and I discovered that it was possible to buy and build my own personal air force. At least that’s how I first thought about the act of buying, building and building up a collection of little aeroplanes. It’s a common enough story, I suppose, little boys getting addicted to Britfix glue and through it, addicted to the inexpressible joy of making little aeroplanes out of bags or boxes of odd shaped bits and pieces..
Perhaps another beginning was in the 1990s when circumstances led me to do a course in museology. At the time I thought of it as a good way of improving my skills as a historian, but it also planted in my mind the idea of a collection of scale models as a scale model museum. At that time I went weekly to work – perhaps play might be a better word – at the major aviation museum in Western Australia which proudly boasted that it had a collection of something like 30 aeroplanes, the biggest of which was an Avro Lancaster. I did not think this was particularly remarkable, after all, I had a much larger collection of aeroplanes than that, and many much bigger (in real life) than a mere Lancaster. Thus the idea of a collection of scale model aeroplanes as a museum formed in my sometimes fevered mind.
Next came the idea of a collection policy, something that all museums have. The basic theme for this conceptual museum became the history of the second or third most important nation in aviation history, France. There were, of course, other interesting themes to also explore; the US Navy, airliners, bombers, fighters, light civil aviation, aeroplanes of historical interest, to name but a few. In my original conception of this plan, a good scale model museum might have a thousand or so exhibits representing all the major aeroplanes in the areas of the collection policy. An improbable dream, perhaps, but not impossible and, what’s wrong with dreaming anyhow.
What probably put this dream into the realms of impossibility was the development of all those cottage industry kit makers. When the plan first came to me there were so few kits of French aeroplanes, or many of the other themes, that I did not expect to end up with a really large collection, but then modellers discovered resin and how to use it in making limited run kits, in particular the genius of Jean-Pierre Dujin. After that came the internet as a source of modelling kits and the various swap and sells that take place around Victoria. Like many modellers, there was always more kits than there was time to make them, and so the backlog of kits to be made gradually grew. Some people are able to keep their backlog in one place but in the past few years mine has been spread around in various rooms and houses in a veritable state of chaos. I had a database of what I’d bought and made, but no idea of where everything on that database was. There were kits in boxes and bags, on shelves and in cupboards, and in dusty piles on garage floors and in corners, all over the place.
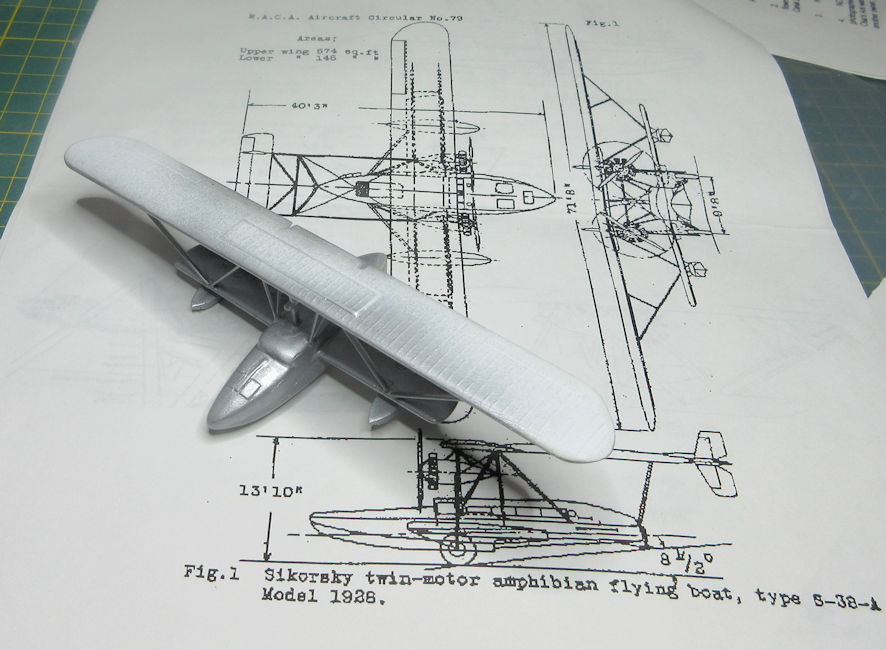
Things might have gone on in this state for a long time, but recently the opportunity came to go and spend some time house-sitting for a friend in Hobart. Tasmania is a place that we have only visited once, and then with little opportunity for sight seeing, so the opportunity to spend a month or two living in Hobart was too attractive to turn down. They say that Tasmania is a very popular tourist destination these days so there is apparently a lot to see during the day, but how to fill in the evenings? I know that most people would think, but for dedicated modellers the obvious answer is to make scale model aeroplanes, of course. Although we’re taking the car so space is not a serious problem, it still seemed to me that instead of taking a pile of easy-to-make kits, it made more sense to take a few kits that would be very time consuming to make, and there are no more time consuming kits than vacforms. I’ve got a lot of them stored up for future construction but at the moment I’m completing a beautiful Latecoere 631 flying boat so, what better kits to work on than other flying boats. I have kits for several beautiful inter-war flying boats including the Sikorsky S38 and S42 and, most attractive of all, the Short ‘C-Class’ flying boat. I also liked this idea because the C-Class plays a major part in my PhD thesis and several academic articles I’ve written in the past decade or so. I have a Welsh Models kit of a Qantas Empire Airways C-Class, according to my database and memory, which will require a lot of painstaking work to put together well. But, where was it? I looked at my database and there was nothing in the field telling me in which box the kit should be. At first I dashed about looking here and there, diving into boxes and shuffling around in cupboards, with a frustrating lack of success. After a while I decided to get methodical..
At about the same time as this was going on Valma and I decided to watch all the Indiana Jones movies, or at least the four that we have in our collection. For my money, the first and third are the better ones, there are less interesting plots in the second and fourth and the special effects are expected to carry the movie instead. Of course, the best special effect in the first movie is the closing scene where the Ark of the Covenant is sealed in a box and wheeled into an apparently infinite warehouse to be lost for all times, the same warehouse that we visit again in the fourth movie. I have to say that my search for my own holy grail – the Welsh Models C-Class – made me identify with Indiana, not that I have a whip, run across strange looking tanks in the desert or travel in Ford Tri-motors around the world. Still, I could empathise with him when it comes to trying to track down seemingly ancient artefacts in hidden places.
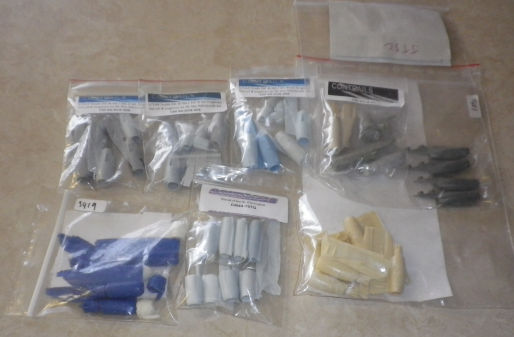
When we moved from Raglan Street I packed a lot of kits into some large moving boxes and sealed them. Most are still sealed and I worked on the assumption that my C-Class is not in any of them. However, there were many other boxes that I’d since opened and taken kits out of, and put other kits into. I got all those boxes together and started piling them up. I also began gathering up kits from all over the place, dusting them off and putting them into more boxes. More often than I care to admit, things turned up that weren’t on my database including, for example, three of those Tupolev TB-3s with I-16s dangling under their wings (two in 1/72 and one in 1/144). All I can imagine is that people have given up trying to make this kit (our club president finally put one together afer an epic struggle) and instead sold them at swap-n-sells where I could not resist temptation. (I gather, from the evidence before me, that I am not good at resisting temptation when it comes to many of the exotic model kits.) There are also a lot of large 1/72 kits that I have lost interest in since I’ve become interested in 1/144 scale airliners, including things like B-47s, An-24s and B-24s. How I came into possession of a resin 1/72 B-32 is also quite beyond my comprehension. A lot of it will probably be sold off in due course, but not until I’ve finally got it all together and organised. And while I looked through all these kits I kept hoping that my C-Class would turn up in the next bag or box that I opened. But nothing, and I was starting to get worried.
There are enough kits in enough boxes to stock a reasonable model shop, but not Hobby HQ I hasten to add. With the exception to special aeroplanes like BAC Lightnings, Vought F-8s, Boeing 747s, DC-8s and a few others, there is only one kit of most aeroplane types and people looking for Spitfires, Bf109s, P-51s and that sort of thing would be disappointed if my collection were to be sold. But if they were looking for obscure inter-war French light aeroplanes or French experimental fighters, I would have just the kits they wanted.
Over the space of a few weeks the collection gradually came together, carefully dusted off, stacked, put in boxes and catalogued so that, in theory at least, I can find any kit in my possession with relative ease. It’s not quite as bad as the warehouse in which the Ark of the Covenant was stored, but it feels like it at times. Discovering that my collection of unmade kits is large enough to form a real wall of doom has been edifying and alarming, but it explains why I find little of interest on tables at swap-n-sells or on eBay. I’ve already got one of just about anything that interest me in my wall of doom.
So, after days of work all the kits I own were in boxes, stacked up neatly, and my database was as complete as human error allows. There was still no sign of my long sought-after C-Class, but I’d seen it listed on my database so it had to be there somewhere. I asked my computer to list all the kits that did not show up as being in one of the boxes and it showed me a dozen entries, but the C-Class was not among them. I was getting desperate by this stage and thinking that my memory must be playing tricks but, just to check, I looked up the full table entry for all kits and models, and there it was. This time, however, the entry told me that the kit was stored in Box 11, one of the boxes that was still sealed. I went, opened the box, and there was the kit sitting on top, waiting patiently for me to get around to making it. I swear that previously that field had been empty, which was the reason why I’d gone to all the trouble of bringing the collection together in the first place.
I can hear you sniggering. That’s not nice. What! You’re not sniggering, this is too serious for that. I can hear someone sniggering, you’re sure it’s not you. It’s not! Do you believe in the Modelling Gods. You do? It must be them laughing at me. What did I do to deserve this?
My Hobart Hiatus
(April 2013)
Despite rumours to the contrary, where I did disappear to was Hobart. You know, that bit at the bottom of the forgotten island at the bottom of Australia. The main reason for this hiatus was to look after the dog belonging to a friend who had to go overseas for a few months and also to see a bit of what Hobart and Tasmania are like. We ended up in a place called Battery Point which is, as it’s name suggests, where the first defensive positions for the settlement at Hobart Town were located. It dates from the 1820s, before the invention of town planning and the wide streets you see in places like Ballarat and, while there are a number of impressive mansions, there are even more tiny cottages, a heritage reminder of the British class system and an affront to my socialist soul.
Having to take a dog for a walk twice a day makes me wonder about dog owners. Don’t they have anything better to do? On average I spent about eighty minutes a day out in the streets of Battery Point, looking at every corner of the suburb and thinking about all the other interesting things I could be doing. For example, if I was still in Battery Point I would probably be out walking the dog about now rather than sitting down making this newsletter, with a cat curled up happily on my lap. I could also have spent that time working on models.
Speaking of model making, you will all have heard of the Salamanca Markets that take place in Salamanca Place every Saturday. Living about five minutes walk from it, I went two or three times and my main impression was of lots of people, like going to the Expo Swap n Sell but without interesting things to look at. There are several modelling shops in Hobart but I only got to the one in the city. On Saturdays there is a free little shuttle bus that runs around the city and down to Salamanca Place to bring tourists to the markets. Working in reverse, the bus also stops only half a block from the model shop in the city and so I availed myself of the service to go model shopping. The three or so times I went to the shop on a Saturday morning there was almost nobody inside but the fellow behind the counter told me that there is usually a big rush between about 1100 and 1200 when men from all over Hobart are liberated to come and look and spend while their womenfolk are doing other things, perhaps at the Salamanca Markets.
I did have some serious and expensive computer troubles while in Hobart, which is my excuse for not having produced a newsletter last month. I did have some time in the evenings to work on models and got a few – nice interwar airliners of course – more or less completed. One of them was the Welsh Models Short C-Class flying boat, but I’ve got to the stage where I need to mould new engines for it, so it’s not ready yet. I last had a go at moulding stuff in the 1970s and I’m still scarred, so I’m screwing up my courage to have another go at it. Anyone know the name of a good psychiatrist?
MY TOOL BOX
(April 2013)
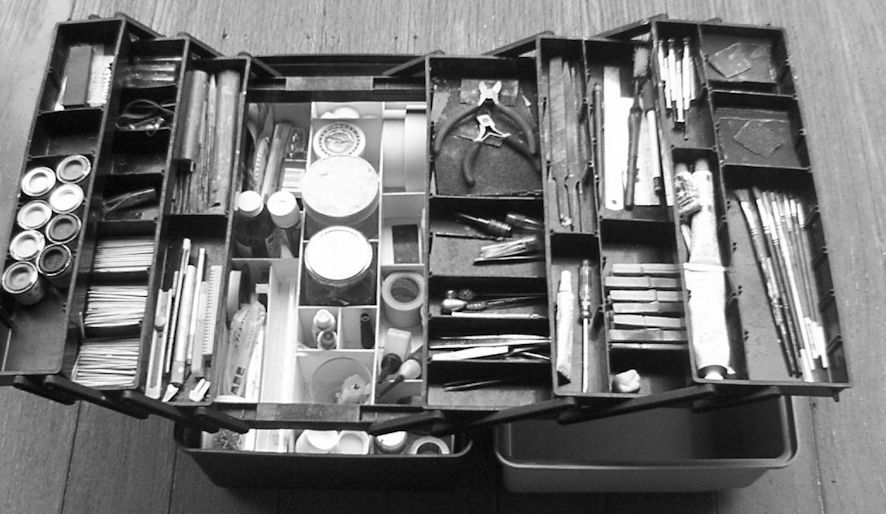
I guess that every modeller has their own collection of tools and techniques for using them. They probably have different ways of storing their tools so they are ready to hand when they are needed. For years I kept my tools in boxes and mugs so they were easy to reach when I needed them but when we moved to Perth I found I did a lot of model making on the back patio, which meant a lot of running inside to lay my hands on the file or tube of filler that I needed at that stage in a project. This was probably good for me in giving me the exercise I otherwise would not have got, but it was annoying so I bought myself a little tool box that I could carry out to the back patio when I was doing modelling there. This worked alright but there were still some tools that didn’t fit so I still had to go and get them. The solution was a bigger tool box, and then another one when I saw the big one that I’m using these days.
In theory everything I needed to make a model was in the box. Over time, however, I came across new tools and new techniques and they went into other boxes that were in easy reach of my work table and, conversely, there were things in my tool box that gradually fell into disuse and gathered dust in there. When it came time to spend a couple of months away from my work table it also became time to have a new look at what was in my tool box, to dispense with things that I no longer used and find space for things that I did use. As a result just about everything I now use regularly is back in my tool box and it is probably a good summary of the tools I use and how I use them. (There are of course, things like boxes of paints and tools like my Dremel that are too big or which I don’t use very often that still have to live outside my tool box, but are still within easy reach.)
A decade or so ago I started out on a discussion of the bits and pieces that were then to be found in my tool box in this newsletter. As I recall it, I didn’t get much further than a discussion of tooth picks and their multiple uses before I ran out of space and this time around I could spend even more space on discussing this important aspect of modelling because I now have two kind of toothpicks in my tool box, round ones and flat ones. But let’s start elsewhere.
Let’s start with glues. Although I use 5 minute epoxy, it is not very often and so it seems to have disappeared from my box. I have the usual solvent glue for plastics, I prefer Revell Contacta because of its lovely little metal snout that puts the glue in the right place and in the right amounts. If you use this glue you will have noticed that the glue dries up in the tube from time to time; for a long time I used to solve this problem by using my reel of thin craft wire to unblock the tube but recently I’ve made myself a little tool to do that job.
Since I so a lot of modelling with resin and white metal, as well as various kinds of plastic, I use a lot of super glue. I’ve found the most convenient form of super glue to be Zap, which comes in three thicknesses; thin, medium and thick. You can buy cheaper Selleys super glue at hardware shops or in supermarkets and it works well, but I’ve found that having the choice of three consistencies is useful and the little bottles they come in store more easily. The real problem that I used to have with super glue was getting the right amount in the right place but then I discovered a range of little applicators sold by Micro-Mark in the US. They come in three sizes to match the three consistencies and although you have to dispose of the applicator after a few minutes use they are not terribly expensive and well worth the cost. The final part of the equation was somewhere to dispense the glue so it could be transferred to the model using the applicator. Micro-Mark also sell a little tool for this but I didn’t find them very useful and mine has gathered dust. Instead, I used a plastic teaspoon with the handle cut off, stuck to a bit of cardboard using blue-tac for stability; much cheaper and easier to use. Besides, when one teaspoon starts to get full of dried super glue it was easily replaced by a new spoon which cost next to nothing in packets of twenty at Coles.
This system didn’t spring into reality fully formed but evolved slowly through experimentation. I found that the three bottles of super glue fitted neatly into a small plastic cup that I has collected when I wrote the history of Barwon Water and then I found that the applicators fitted nicely into another cup of similar size. These, along with the plastic teaspoon, sat separately on a shelf but, when I reorganised my tool box, I invented a simple device with the two cups stuck to a bit of cardboard onto which the teaspoon was also stuck with a dollop of blu-tac. And voila, a handy super gluing tool for all occasions that fits neatly into my tool box and can easily be lifted out for use.
Next along the bottom of the box is three rolls of Tamiya masking tape; 6mm, 10mm and 18mm. They come in little grey dispensers but you can buy refills that are cheaper.
In years past I used to use rolls of masking tape bought at a hardware store and cut up into strips to whatever width I needed. This saved money and a cheap roll would last for years but the saving wasn’t worth the stress when it came to things like paint seeping under the tape because it was too thick to conform to the surface or too sticky and pulled up paint. (I’m still in therapy about what happened to a Qantas Boeing 747 when I oversprayed the red tail on the all white fuselage and then pulled off the cheap masking tape.) As a result, I have seven masking tapes in the box these days, as well as a bottle of Humbrol Maskol. One of the others is a roll of Tamiya 40mm tape and the others are rolls of Aizu tape in 0.4 mm, 1mm and 1.5mm which I use for very fine masking. (From this you’d think that I like masking but this is not true, I like the results of masking airliner models which needs this kind of thin tape for those curves on modern airliners.) Masking tape bought over the counter of modelling shops of Australia can get expensive, during our last bus trip I saw a roll of Aizu tape that cost something like $15. To overcome this problem I do what most modellers do these days, buy cheap from overseas suppliers where a roll of Aizu tape costs less than $2.
(Too large to fit in my box is a roll of kitchen aluminium foil that I use to mask large areas and some plastic shopping bags also used to mask large areas. But make sure that there are no holes in the bags; if there are and you don’t notice distress and anguish can be the result.)
Next along the bottom of the box is a thick glass bottle of paint thinner which is used, as you might guess, to thin paint and clean paint brushes. Although I paint most models with an airbrush or spray cans there are lots of little details that need hand painting so I have a selection of small paint brushes ranging from 000 up to 6. I could probably get away with three or four brushes but I have more than I need because I always forget what size brushes I have when I find myself in a craft shop (as you do) and end up buying more just in case. I also have a nice flat sable brush which is used exclusively for painting Micro Sol (of which there is also a bottle in the box) over setting decals. I don’t know about you, but I can’t get much advantage from using Micro Set in the blue bottle, but wouldn’t be without my Micro Sol. There is a lot more to explore along the bottom of my tool box, not to mention what is in the upper tiers.
THE POWER OF PLANNING
(or How I Made Trouble for Myself, Again)
(October 2013)
If you find yourself chatting to Master Mark about his modelling you will soon discover that a part of the process he really enjoys is the planning of his projects. You may find yourself looking into a box of Mach 2 parts and wondering how anything good can come from it, but Mark has a plan. This mis-shapen piece of plastic can be replaced by a resin piece imported from a special manufacturer in Outer Mongolia, other parts can be sourced from the spares box and the decals can be replaced by a special set he picked up on our bus trip three years ago. Every problem has been resolved conceptually well in advance and everything has been arranged so that the modelling process itself is the performance of a set of well defined and planned processes. What a wonderful world it would be if everyone thought and acted like this.
If one was to open up Master Mark’s cranium and peer inside one would no doubt find all the neurons carefully arranged in orderly patterns, a marvel of order and precision. If, on the other head, you were to look inside my head you would find no such order and perfection. All is chaos and confusion. I think of myself as one of those modellers who opens the box and starts gluing parts together with scant attention to the instructions until something goes wrong. No planning required here.
That, at least, was how I thought of myself until recently. I woke one morning with the urge to make a model of a DC-8, one of the most elegant of airliners. Fortunately I have collected a few Minicraft DC-8 kits over the years and read up on all the variants with their different wing and fuselage sizes and engines. However, this thought led to a process in which I find myself working on a set of Boeing airliners. Also, over the years, I’ve collected after-market engine sets that will allow me to make many of the DC-8 versions and they had gone into a box with many other conversion sets for airliners. As I started shuffling through the box there was a plastic bag with two large plastic tubes that kept getting in the way. What was it? Peering at the label on the bag I found it was the fuselage extensions to convert a Minicraft Boing 777-200 into a -300. I pushed it to one side to find another, slightly smaller, conversion kit. What was it? Conversion parts to turn a Revell Boeing 767-300 into a -400 and, after I pushed that to one side, a smaller set that would convert a Minicraft 757-200 into a -300. (I have a vague memory of buying the 767-300 conversion set because I had to find it on ebay, but I’m not sure how the other sets came to be in my box.) Only after they were out of the way could I get to the DC-8 engines. How annoying, I thought, to have all those lovely DC-8 engines covered up by these conversion sets. I only thought momentarily about dropping them in the bin, but the only serious solution to the problem was to actually use them to make models.
You may recall that I made the complete set of Boeing 737s, from -100 to -900, a few years ago. That was quite an exercise with collecting all the kits and parts needed, finding out the lengths, wingspans and engines for each version and finding decal sets from some of the less common versions. Now I had to do it all again, and that meant
PLANNING
The first part of the planning process is strategy. In a burst of logic that now escapes me I decided to make the 767s first, then the 777s, then the new 787, and then to work my way back through the numbers to the 757 and 747s to the 727, 717, 720, 707 and beyond. Next comes tactics which requires a lot of reconnaissance, also known as research. (But nothing too detailed, I don’t mind doing research in depth but I prefer people to pay me for it.) The two most useful sources of research are Wikipedia, which has as much detail as I need about size, engines and other details, and Airliners.com which is a wonderful source of photographs of just about any airliner you can imagine. Using the photo index you can find photos of most airliners sorted by sub-variant and operator. I don’t know that I wrote the result of all this planning on a piece of paper but working it all out did occupy a lot of my time.
Armed with this research I then began trawling model retail interwed sites such as Airliner Hobby Supplies looking for engine sets, wing-tip extensions and decals. There was also the matter of paint schemes to go with the decal sets and finding suitable paint. This is not as easy as making military models because the model paint manufacturers don’t pay much attention to airliners and very few airliners appeared in late-German camouflage schemes.
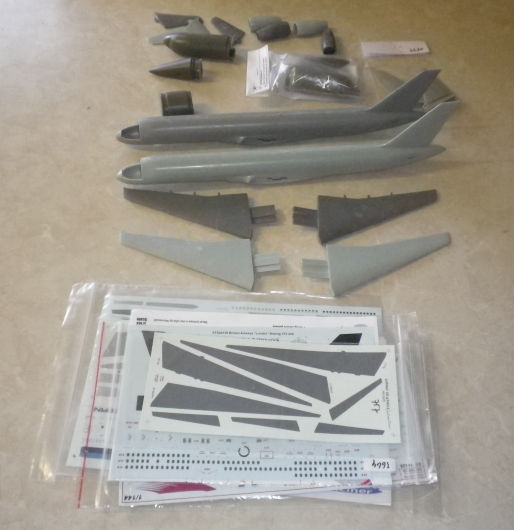
After a couple of months I was ready to start cutting plastic, literally. The first model onto the production line was an Ansett Australia 767-200, which is shorter that the -300 of the Revell kit. This is an interesting technical problem because sections have to be cut out of the fuselage in front of and behind of the wings. It is easy enough to find out how much shorter a -200 is than a -300 but not to find out how much comes out of either side of the wing. I don’t know how others do this but I do it by counting the number of windows, and working out how many less windows a -200 has than a -300, and then cutting them out, carefully.
Next came the 767-300 which is made more-or-less straight out of the box, but making sure that the engines were the ones used in the Qantas fleet because the 767-300s flown in Australian colours were taken out of the Qantas fleet. Finally came the 767-400 which would use up the fuselage extension parts I’d found in my box. Sadly, it turned out that the extension set was rather poor and too wide in diameter than the kit fuselage, so they ended up in the bin afterall. Fortunately for me, it turned out that the fuselage sections cut out of the -300 to make the -200 were exactly the same length as the extensions needed for the -400, so in they went instead.
Overall, the three 767s turned out fairly well, and the 777s were not too much of a problem. The 787 is being made straight out of the box with improved engines and aftermarket decals, but then I have to turn back to make the Minicraft 757s, which are a whole new world of hurt.
Let this be a lesson to you, boys and girls, planning can be bad for you.
A Matter of Philosophy
October 2015

Here is a photo taken at our most recent MoB meeting by Master Sean. It shows four MoBsters, innocently it seems, sitting at a table. Master Rod, on the right, is in a state of deep mystical meditation on the completion of his latest modelling project. Master Zim, on the left, is looking glum because he has been struck down by the lurgi and wonders if death might release him from his torment. In the middle, Masters Mark and Leigh are, despite their cheerful appearance, debating a matter of serious philosophical import. It should be noted here that both Masters Mark and Leigh hold degrees of Doctor of Philosophy and are thus qualified to talk about philosophy, sort of. Master Zim also holds a PhD but he is an engineer, and we all know what engineers think.
So, what is this philosophical point that our two philosophers are debating? Since this is a meeting of scale modellers you will not be surprised to learn that it is about the philosophy of modelling, specifically the appearance of a completed model. Let me explain, and if you’re not interested in such idle chatter I’m sure you will find something more interesting on the following page.
Dr Mark holds that the important thing about a completed model is that it should reflect or show the truth of the item that it represents. Thus, a model of a Bf108G-6 flown by Oberleutnant Joe Blogs on the afternoon of 22 July 1944 should look as much like the real think as possible. He argues this from the theoretical perspective of Neorealism, which, as I understand it, grown out of the Italian film industry of the 1950s. It posits, among other things, that a thing should show the reality or truth of its situation. This suggests that just because something looks real, it is real. A possibly valid perspective. I point out, however, that this is at basis an Italian concept and Dr Mark makes models of German aeroplanes. Need I say more.
I, on the other hand, argue that the idea of truth itself is problematic and contested. Therefore, the idea of a model that shows the truth of a subject is also problematic. All knowledge is provisional and so it is not possible to know the truth of Oberleutnant Joe Blogs Bf109G-6. Just because you have a side colour profile of said aeroplane in a book you brought at Hylands, and a decal sheet, does not make it true, though perhaps true philosophically.
Of course, we should not confuse the concepts of truth and beauty, although it is possible, though a fallacy, to say that something is true because it is beautiful. But I digress.
I argue that, to do some damage to the saying of that great twentieth century political philosopher, Mao, truth – in a modelling sense at least – grows out of the box of the kit from which the model is made. Thus, the truth of a model grows not out of the model which the modeller attempts to make, but out of the kit from which the model was made. Thus, in a real, but also philosophical sense, a model is in truth always a Hasegawa or an Academy Bf109G-6. I point out, to bolster my argument, that the philosophical basis of this argument is French and I make French models. I rest my case.
So Much Effort, So Little Result
May 2020
Some modellers make one masterpiece at a time, lavishing infinite skill and patience over every tiny detail and finishing their creations with the skill of master craftsmen. Then they spend as much time again giving it the patina that turns their model from a simple plastic scale model to a likeness of the real thing bearing the marks of time and use bestow on things. Some of them then go on to locate their creations in a base that tells a story about a moment in time which creates a relationship between the people it to a location where it was used. The result can be a work of great artistry and beauty.
I am not one of those modellers. I like sticking pieces of plastic (or resin or metal) together and applying paint to the result to make it look something similar to how the original item looked. I might have the skill and patience of master modellers but exercising it does not interest me. When those modellers go to a competition they are inspired to make even better models, I am inspired to make more models. This sets me counter to current trends in modelling which emphasize the finished item as a work of art, is a trend that I am quite happy to look at but not to follow.
Many modellers, I suspect, have two or three kits on the go at the same time. It is necessary to give work to idle hands while glue, filler and paint is drying or while the modeller waits for a necessary component to arrive in the mail. Having more than one model to work on also means that if a modeller feels like sanding and scribing they have a model at that stage in the process or if they feel inclined to putting some decals on their model they can do that too. Most modellers might also have a model or two that they have become bored with that sits at the back of their shelf while they find newer kits more appealing.
Normally I would have five or six models in various stages of preparation, one or two on the verge of completion and another in the early stages of construction. This means that if I don’t want to have to face up to checking for seams and imperfections I can instead do some masking or some decalling. That’s the theory anyhow. This way I can usually count on having completed two or three models to a standard that pleases me every month, one or two of which are worth writing about. But that hasn’t happened this month. Sure, I have a couple of newly completed airliners that are not worth writing about at the moment and a little French fighter that was such an annoying kit that I refuse to mention it again. Then I look around my room and see that there are another ten or so models in various stages of completion, which means I’ve been busy this past month but have yet to see any finished models as a result. Of course there are excuses, or reasons, that none of them have been completed.
First off there are three Revell 1/144 A.320s that are almost completed but need some decals to complete them. Two simply need some decals for the tail markings but the ones that came with the decal sets were too small and I’m waiting for replacements. I attempted to fill the white spaces that should be covered with decals with paint mixed to the right shade but I failed in this process on both occasions, partly because the areas that need filling are not one single shade and new decal sheets will fill the gaps nicely to the right colour intensity. The third one waits because the decals for it I got from my usual source were so brittle that they cracked rather than settling down well, and I’m hopeful that decals from another supplier will take a greater liking to that model. However, during the current crisis mails are annoyingly slow, so those three models sit on the shelf, waiting patiently.
Another three models are three more Revell 1/144 airliners, an A.320 and two A.321s. They have gone through the process of construction and refinement to the stage that they have now entered the painting process. The engine pods are already painted, masked and mounted to the models and the first stage of painting, the metallic leading edges has been completed and allowed to sit for a day or two to set. Next they need careful masking, and have I told you before how much I dislike masking. So it might be a few days before I push those three models on to the next stage.

Next come three models that have all arrived at the verge of the painting stage at the same time. First is a F-Rsin 1/144 resin airliner which, being designed and built before World War II, is in an all metal finish, so that part of the process will not be difficult. I stalled on this one because it occurred to me that while the air intakes and radiators are nicely formed on this kit there were no exhaust pipes. (Such omissions are not unusual from this kit maker but if you want to make the models they offer you have to deal with them.) It took me a couple of evenings to figure out how to overcome this problem and to do something about it, and an evening of drilling holes and bending pieces of wire to replicate exhausts has now made that model almost ready for completion.

Next we have the new KP 1/72 MiG-19S which only arrived here a week ago. I’ve been wanting to make a decent MiG-19 model for many years and here at last is the kit to do it, more or less. However, having reached the painting stage, I now find that I don’t have the stainless steel lacquer paint to replicate the blast panels on the sides of the fuselage which are a prominent feature of all bare metal MiG-19s. That model now needs to wait until I can order the necessary paint and it arrives.
After that is the little Kora 1/72 Dewoitine 53 which is one of those limited run kits that emerges from eastern Europe to annoy modellers. By the standards of kits from this source this is not so bad and it amazed me by having a cockpit interior that actually fitted inside the fuselage halved snugly, until I tried to install the instrument panel as well. That was discouraging enough to set the model aside for a week or two but the delay also came because the kit offers options for models in either silver or green and silver schemes and I would have liked to make the green and silver one. However, that would have meant painting the model first and then joining the parasol wing to the fuselage, a nail biting task at the best of times and only to be attempted by geniuses when faced with a Kora kit. Eventually I decided that I would have to settle for the all silver model and yesterday went about the process of attaching the wing to the fuselage. All I want to say about that is that during the process I wished that I had more words of profanity in my vocabulary than I currently do because I needed every one of them. When a few days have past my mental equilibrium might have returned sufficient to continue with this model.
Then there is the Fokker 100 kit that sits unopened at the moment. It replaces the previous Revell 1/144 kit that I was in the process of converting to a Fokker 79, which is basically a shortened Fokker 100 with different engines. That kit ended up in my rubbish bin because, when I cut two chunks out of the fuselage of the Fokker 100 kit, I used the Welsh Models conversion kit to judge the amount of plastic to be removed. That process went very smoothly until I decided to prepare some decals for the windows of a Fokker 70, which I usually do by counting the number of windows on a photo of the real thing and creating a decal to match. Upon holding the new decal against the fuselage I discovered that it was still far too long and needed to be shortened further. A ruler and quick research into the length of a Fokker 70 confirmed my discovery. I started cutting more chunks out of the fuselage but then came across the lead weight that I’d carefully glued in the nose, lost patience with the whole thing and disposed of it. I found another kit on ebay at a reasonable price and bought it, and I’ll get around to making a Fokker 70 properly sometime soon, probably.
After that are the tiny Arctic Decals 1/144 resin kits of the deHavilland DH-86 1930s airliners which are necessary for my plans to make all the flagship airliners that Qantas flew, starting with the DH-86. (I bought two kits because I can also make the second one which was ANA’s major airliner until it was replaces by the DC-2, which I’ve already made). This is not a particularly challenging kit to make except that it lacks propellers, which is a challenged, the need to extend the tailplanes to make a DH-86 rather than a DH-86B, and the kit maker tell me that he is planning to release Qantas Empire Airways decals for this kit later in the year, so there’s no rush on that one.

Finally there is the 1/144 VLE Models kit of the Sikorsky S-38 flying boat. This has been haunting me for many years and one of these days I will finish it. Every so often I take the kit as I’ve made it so far out of its box, look at the plans, ponder the whole thing for an hour or two and put it back in its box which goes back on the shelf again. The real problem is the amount of strutting that needs to be done to install the engines between the two wings, I’m beginning to think that I will have to simplify the struts it just to get this project finished and that nobody will notice the difference, given the scale of the thing and the fact that nobody I know, or am likely to know, knows what a Sikorsky S-38 looks like anyhow. In a year or two I might be able to bring myself to do such a terrible thing to this little model and in the meantime it goes back into its box again.
So, that’s what’s holding up my modelling progress at the moment. What’s your excuse?
THAT WILL BE $29.95, THANKS
A refutation of the whig view of modelling history
(August 2005)
Several thousand years ago, or so it seems, one of the most advanced kit makers of the time released a kit of an obscure British aeroplane. Of course, Frog had always dabbled in oddities such as the Gloster E28/39 and the Bristol 138, but even by those standards the Westland Wyvern was an odd looking thing. Of course, I bought one for a few bob and had it together in a few hours. It was one of the more unusual looking models among all the Spitfires, Mustangs and Me109s that youngsters make. I liked it.
However, as I grew up the simplicity of Frog’s Westland Wyvern made it less attractive in the midst of all the developments taking place in kit manufacturing. In particular the cockpit began to look very empty and the mouldings began to look cruder by the year, in comparison with the products of the new Oriental kit makers. To my mind one of the most annoying problems was that the exhausts of the turboprop engine were represented merely by suggestive lumps and holes on the fuselage side.
Later I learned how to correct most of the problems with the Wyvern; how the trailing edges could be thinned, how a fairly representative cockpit could be made without too much fuss and that a bit of plastic tubing of the right diameter let into the fuselage sides could improve the look of the jet exhausts. By that time, however, finding a Frog Westland Wyvern to practice all these new skills on had become the main problem. While most of the old Frog moulds went to Russia and appeared under the Novo brand, the Wyvern didn’t seem to be among them.
Then, one day I was in the Victorian Hobby Center and, in a pile of obscure bits and pieces, I found a little cardboard box with a simple drawing of Wyvern on the top. This was in the days before most eastern European manufacturers had settled down to producing a constant supply of relatively good kits, so the contents of this box was something of a lucky dip. I might have asked to have a look inside but that didn’t occur to me and so I paid my money and took it. If I had been lucky the kit might have turned out to be a new high quality product, but it could also have been junk. Instead, it was neither.
It turned out to be the old Frog mouldings with a little bag of white metal parts to make it into a Wyvern S.4, passable decals and a barely passable A5 size instruction sheet – the text was in English but so badly photocopied you could hardly read it. It was a lot better than having no Wyvern kit at all and the white metal, although far from perfect, was a worthwhile addition. To this I later added one of those vacform canopies thet come in sets from the New Zealand Falcon company.
All I needed now was the time and patience to put the kit together to make a nice little Wyvern. Time passed and a rapid outpouring of kits of French subjects from eastern Europe distracted me from getting on with the Wyvern. Some time later Steve put a nicely made little Wyvern on the MoB table that demonstrated there were no serious difficulties with the Frog kit. Again I was encouraged to get out the kit and have a go, but again there were other distractions and so …
In the history business you learn the phrase ‘whig history’. Its source is old and interesting but these days it means, more or less, the kind of history that sees the past as a succession of steps from worse to better so that today we are living in the best of all possible worlds. These days we have computers, mobile phones, airbrushes, Alcald II, Superscale decals, etc, etc. We’ve never had it so good. The whig view of history also applies to plastic kits. We started off with primitive Airfix and Frog kits, and a number of now long forgotten but not regretted brands, evolved through the arrival and maturity of Hasegawa and Tamiya, the introduction and maturity of the eastern European kits and now the high quality and relatively inexpensive western European kits produced by Revell and Italeri. More recently we’ve also had the arrival of Dragon and Trumpeter from China. Modellers have never had it so good, according to his historical perspective.
When I was introducing poor undergraduate students to the idea of ‘whig history’ it was necessary to point out that not everything really gets better all the time. The environment, social cohesion, working conditions, and so on. Of course, the point of ‘whig history’ is that things are usually getting better for somebody at the same time they are getting worse for others. The rich get rich and the poor get poorer, for example. And I’m here to tell you that this kind of thing goes for modellers too. While things get better for some modellers they get worse for others. I’m one of the latter.
Like many modellers I’ve been watching the arrival of Trumpeter with interest. If nothing else, this Chinese company is not afraid to use lots of plastic and so they have been producing an expanding range of huge kits in big scales. I see they have a 1:48 Fw200 on the way. It comes complete with a home extension kit. They have also been doing bits and pieces in 1:72, memorably their Tupolev Bear that comes with a loan application form. They also produced a very tidy North American F-107 that seems to have disappeared from shop shelves these days. So when they said they had a Westland Wyvern on the way the general modelling populace waited expectantly.
This afternoon I happened to be in Melbourne for a meeting. Having a while to kill I took myself to good ol’ Victorian Hobby Centre to ponder the prices of modern plastic kits. As I was walking down the aisle to the relatively inexpensive eastern European kits (also usually available from Mr NKR as superior prices) the person who had come into the shop after me struck up a conversation with the person at the counter.
‘The New Trumpeter Wyvern hasn’t arrived yet?’ He asked hopefully.
‘We’ve just got them in’, came the reply. ‘They’re down that aisle there.’
As I heard this I looked at the shelf in front of me and there were a couple of the new Trumpeter Wyverns. I took them out and handed one to the eager customer who could hardly wait to pay for it and get it home. There I was with the other one in my hand. What to do? There were none left on the shelves, new arrivals like this tend to sell out quickly and you never know when you will see another one. I looked at it and thought about the little Frog kit waiting for me at home. I looked at the price tag of $32.50 and considered the problems that still remained in improving the old kit, including the business with the jet exhaust. After a moment or two of vacillation I gave into temptation. The fact that the shop gives model club members a discount would bring the price to under $30, which is starting to be reasonable these days. It didn’t even occur to have a look inside before I handed over my money. Quelle imbécile!
A little later I had the opportunity to sit down, open the box and have a look at the contents. My first impression was that there seemed to be a lot of space in the box (you could fit four Frog kits into the same space) and a cursory inspection of the various mouldings in their plastic bags suggested that this kit is a good example of the Trumpeter house style. The decal sheet is pretty good too. So far, so good. It was only when I began to look at the details and flick through the 16 page instruction manual that the initial sense of enthusiasm began to turn to a kind of stomach churning dread.
This little aeroplane model which has (so the box top tells me) a wing span of only 186.5mm and a length of 179 mm, has 151 parts. Good grief, the original Frog kit had around 30 parts. So, if you measure the value of a kit by the number of parts it has, you certainly get value for money with this new Wyvern kit.
Where do all these extra parts go? First there’s the cockpit of about 24 pieces, main undercarriage wheels of four pieces each and a veritable cornucopia of bombs, rockets, torpedoes and drop tanks. There are also two rocket packs to help the laden aeroplane take off (with all those underwing stores it’s no wonder) that takes up another 14 pieces each. There’s airbrake assemblies of three parts each, those little transparent bits that go on the wingtips and for other navigation lights and a 14 part propeller assembly. To top it off, you get folded wings with separate center section, outer wing panels and wingtips, with the folding mechanisms too. When you go on the internet to read reviews of this kit they will no doubt say this kit is fabulous. That, however, depends on your perspective.
My trouble is this. All I wanted was an accurate and relatively easy-to-assemble kit that took care of some of the problems of the Frog kit. What I got was enough tiny bits of plastic to enable me to win the ‘out of the box’ trophy at almost any competition around the world. For me 151 pieces of plastic is unnecessary and unwanted so, while this kit will be a step forward for most modellers, it is a step back for me. For example, this Trumpeter kit will have to be extremely accurate for me to be able to make it with the wings unfolded. Trying to get everything square and true is likely to be a horrendous task so that what should have been simple is now a source of unnecessary angst. Four part main wheels is simply rococo embellishment, and even with the cockpit open most people won’t be able to see most of the wonderful but unnecessary detail. To make this possible the cockpit canopy naturally comes in two parts, while I prefer a closed canopy – you know how difficult it can be to get the two tiny clear parts to line up accurately without smearing glue everywhere. To add insult to injury, this kit more or less replicates the same fault the old Frog kit with the jet exhaust stuck on the side of the fuselage, so the same surgery will be necessary on the new kit as it was for the old.
Following my realization of the terrible implications of the problems involved in making the Trumpeter Wyvern I sat for a while looking at this jigsaw of tiny plastic pieces, wondering what to do. With luck the old Frog wings can replace the Trumpeter wings to take care of that problem. The old Frog wheels will probably make life easier than struggling with the Trumpeter four part ones. Hopefully the Falcon vacform canopy would replace the Trumpeter two part canopy without too many fit problems. As for all the underwing ordnance; I can’t use it all, the white metal rockets that come with the old Frog kit are pretty good and, anyhow, I usually like to leave armament off to show off the lines of the aeroplane. After a deal of unhappiness and deep thought on the problems of making a nice little simple model from this kit, I think that maybe it could be done with a combination of Frog and Trumpeter parts. But it wouldn’t be easy. And so a kit that many will regard as a masterpiece of the mould makers art is, to me, unnecessarily complicated and a retrograde step in the progress of kit making. What I wanted was a simple solution to a complex problem and what I got was a complex solution to a simple problem.
Then it came to me. There’s a simple solution. I’ll just make up the old Frog kit. I’ll take this new Trumpeter kit to the next MoB meeting where you can buy it from me. That way I’ll be happy and filled with a sense of relief. I don’t know about you, though.
OUT OF THE BOX
(August 2004)
Now, where was I? The last time I ran out of time to get a model finished before the next meeting I was reduced to writing about my tool box. This time other work has kept me from finishing a lovely little avions Francaise so it is time to go back to my tool box for inspiration. As I recall it, last time I got as far as writing about tooth picks which was really only the beginning of the tools in my box. I didn’t know that it was possible to write so much about little splinters of wood and how they could be used in modelling. With any luck we might get as far as toothpicks again. we may not.
Between then and now I’ve upgraded from the little box I had to the rather larger cavernous container I now have. The previous box wasn’t bad but it was just a touch too small for all the stuff that I need as a modeller so when I saw a whopper in the now extinct ‘Plastic Unlimited’ shop, I bought it. This one has quite enough space for all the stuff I need to use and at the moment there is even a little bit of spare space that l have yet to fill. In time I’ll think of more things to add.
Using a tool box like this accomplishes several things. It puts all my tools in one place so I can carry them around if I want to. It means that there is a place for everything and everything goes in its place to make modelling easier by forcing me to be tidy. Thirdly, it stops stuff from getting dusty from sitting around out in the open, as used to happen before I thought of getting everything into one box. After six or seven years of using a box to contain all my modelling tools I don’t see how modellers can work any other way, but that’s like most things to do with modelling, everyone develops their own techniques and ways of doing things to suit their own temperaments and abilities.
I started using a tool box when we were living in Perth and we spent a lot of the year living outdoors in the lovely weather. Every time I wanted sit outside and amuse myself by working on a model I had to gather up the tools I’d need and take them out with me. After having done this for five or six years it occurred to me that it was a cumbersome way to do things so I looked around for some way to make modelling easier and somehow came across the idea of a fishing tackle box – the kind of thing that has lots of little compartments and fold our trays to hold all the little bits and pieces that anglers use. I bought a small cheap one to test the concept and after a few months bought a bigger one that I used for many years.

My new box, like the previous one, has three trays that folded out on each side with a selection of little bits of plastic that allowed me to make up the petitions to suit myself. So when I got the new box I spent some time figuring out how all the different bits and pieces would best fit in the trays by fitting the partitions in various ways. After experimentation I figured out the best ways to arrange them so that the files, paint brushes, drills, tooth picks and so on and so on fitted together. The additional space allowed me to include some general purpose paint in this box, the kinds of colours that get used on most models such as black. white. silver, red, yellow and French interior blue-gray.
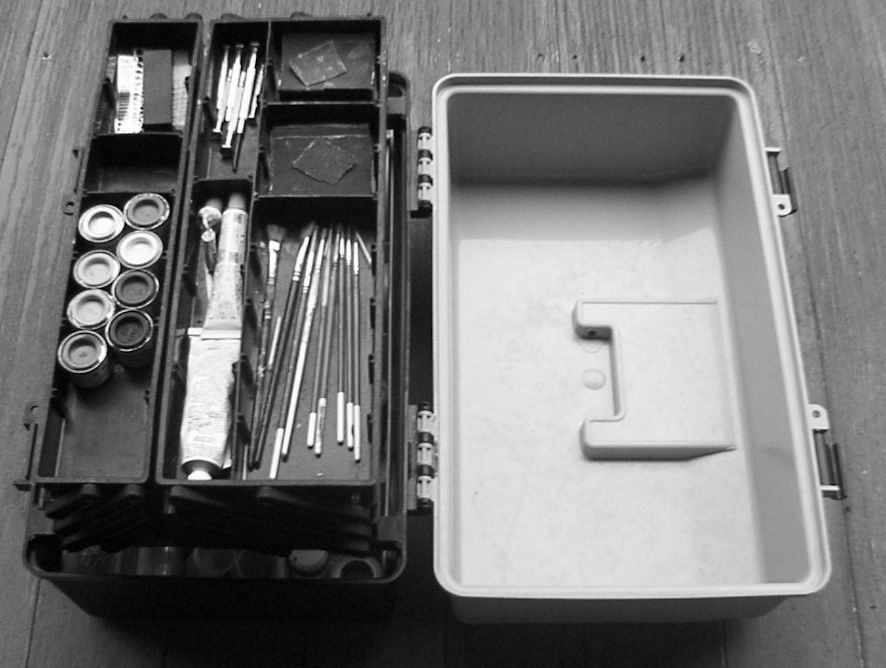
Then I made up partitions for the bottom of the box. In the previous box things had just sort of rattled around and it all ended up in chaos so this time I decided to make it so everything there had a place and things like glass jars holding fluids for cleaning brushes weren’t in danger of clanging into each other and breaking. This project took me the best half of an afternoon, using thick while card glued together with good old aquadhere. The first stage was to cut a piece of cardboard that fitted snugly into the bottom of the box and then built up the side walls and then a series of partitions for the various bits in pieces. In the center were spaces for the bottles of kerosene, water and ‘Future’, little bottles or tubes of super glue and so on. In truth. everything turned out better than l had expected although. as I’ve used the box more, some bits and pieces have moved around so that the various tools or materials have found their right places. This is part of the natural process in which the tools and materials that get used most gradually find their way to the parts of the box that are easiest to reach so it is easy to tell which are my favourite tools just by where they are located in the box.
There are really two classes of tools in my tool box, those that get used all the time and those that only get used occasionally but l wouldn’t be without for those special occasions. Those are the ones I have to rummage around a bit to find whereas the ones I use all the time I can pick up with barely a glance.
So, let’s begin with those tools in the latter category, the little set of modelling knives, all arranged so the blades point in the same direction so I’m not in danger of stabbing myself every time I reach in for one. There are two knives with snap-off blades, both of which I’ve had for far longer than I can remember. The best one is the first knife of its kind that I ever saw, probably in the late 1960s, that is so old it has a metal body rather the more modem plastic ones and most of the paint has been worn from it over the years of constant use. The other is a fairly old plastic one that doesn’t take up much room and seems to fit my had just nicely when it comes to some kinds of trimming. It’s so old that the little snap-off bit in the handle no longer sticks in place so I have to fish it out to snap off a bit of blade. There are also two blade dispensers which shows that I’m forgetful when it comes to stocking up.
Then there are two of the craft knives of the kind that you can fit all kinds of blades into and you just tighten them up to claps them tightly in place. In theory I should be able to use a wide range of blade shapes but somehow I only seem to use the ones with the sharp points that you buy in most model shops in little plastic tubes. I have two of them, one with a thin handle that I’ve also had for ages and a more modern thicker handle that I bought in Stanbridges (in Perth) which I expected to be better to use because it was bigger but somehow I still prefer the old one. As a result it has a dull old blade that I use for jobs such as cutting off slabs of two part epoxy putty and that kind of thing. I recall having been instructed at one time that the snap-off blade knives were not recommended for modelling because they aren’t as stable as the other ones but I prefer them for all kinds of things, particularly because you get much more use out of the blades than you do with the other blades. (Some time back Wayne suggested sharpening blades on the bottom of a mug but that never worked for me and I have a little blade sharpening stone that I use, although I find that only new blades are really sharp enough for things like masking canopies.)
Above the knives are the tooth picks, two segments of ordinary cheap flat toothpicks and one of the fancier round toothpicks. I’ve only taken to using the fancy round one recently and really only for painting wheels because it is easy to twirl then around between thumb and forefinger smoothly to paint the dark grey of the tyre. I used the others for years for wheels and never got the smooth round shape on tyres that I wanted, now I have little trouble. It did occur to me that you could mount them in the chuck of some kind of drill and set it running at a fairly slow speed to get an even rounder shape, but I haven’t tried that yet.
There are so many uses for the old flat toothpicks that I could fill up a page or two writing about them all but I’ve already been there so I’ll rnove on to writing about some other tools next time …
