(August 2001)
In the 1930s the Russian word for Istribityel (Fighter) was synonymous with the name Polikarpov. The first Polikarpov fighter, the I-1, was an advanced monoplane fighter powered by an American Liberty engine that flew in 1923. Although it did not enter service the following I-3 biplane fighter flew in 1928 and about 400 went into service starting in 1929. Following that the Polikarpov I-5 entered production in 1932 and remained the standard Soviet fighter until 1936 with over 800 being built. Next came the Polikarpov I-15, I-15bis and I-153, developed from the I-5. They entered service in 1935 and flew in many conflicts in the second half of the decade including the Spanish Civil War and the war between Japan and China. Next came the I-16 monoplane fighter which was the precursor of all cantilever low-wing monoplane fighters with retractable undercarriage. Just over 7000 I-6s were manufactured, seeing action in many pre-World War II conflicts but being generally obsolete by the beginning of the war with Germany, although they were only withdrawn from service in late 1943.
The Polikarpov I-185 was designed as successor to the I-16. Development began with the I-180 which drew heavily on the I-16 but was powered by a 708kW (950hp) radial engine in a long-chord cowling that was estimated to give it a speed of 557km/h (346mph). All three prototypes crashed, one from engine failure and another breaking up during aerobatics, but development continued. An improved version, the I-185 with a revised wing, flew for the first time in February 1942. It was powered by a M-71 radial engine of 1491k/W (2000hp) that gave it a speed of 680km/h (423mph). Problems with that engine led to development of the I-187 with a less powerful engine and a maximum speed of 615km/h (382mph) but development of the more powerful I-185 continued and two undertook operational trials. A third I-185 joined the test program in November 1942 and plans were made for the I-185 to enter mass production with the M-71 engine. However the engine was still in trouble, one of the I-185s made a forced landing and a second crashed fatally in April 1943. Subsequently all development and production plans were terminated. It was the end of a successful line of fighters from the Polikarpov design bureau and names like MiG, Lavochkin, Yakovlev and Sukhoi took centre stage.
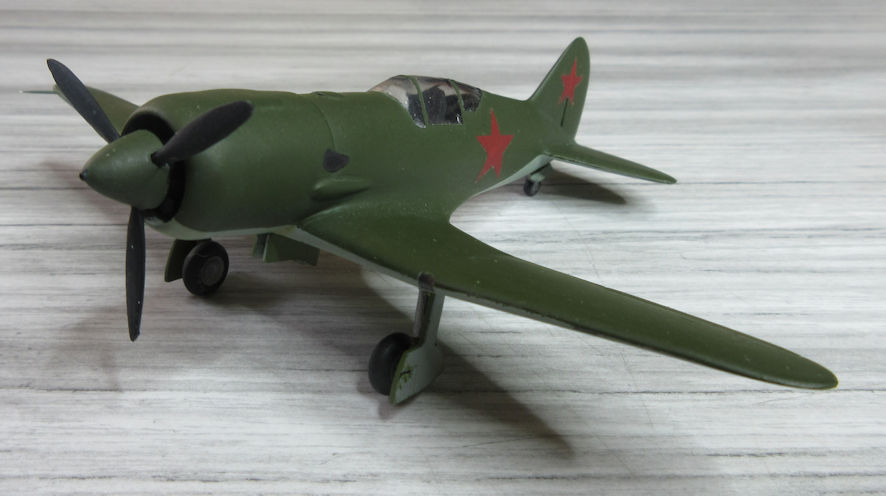
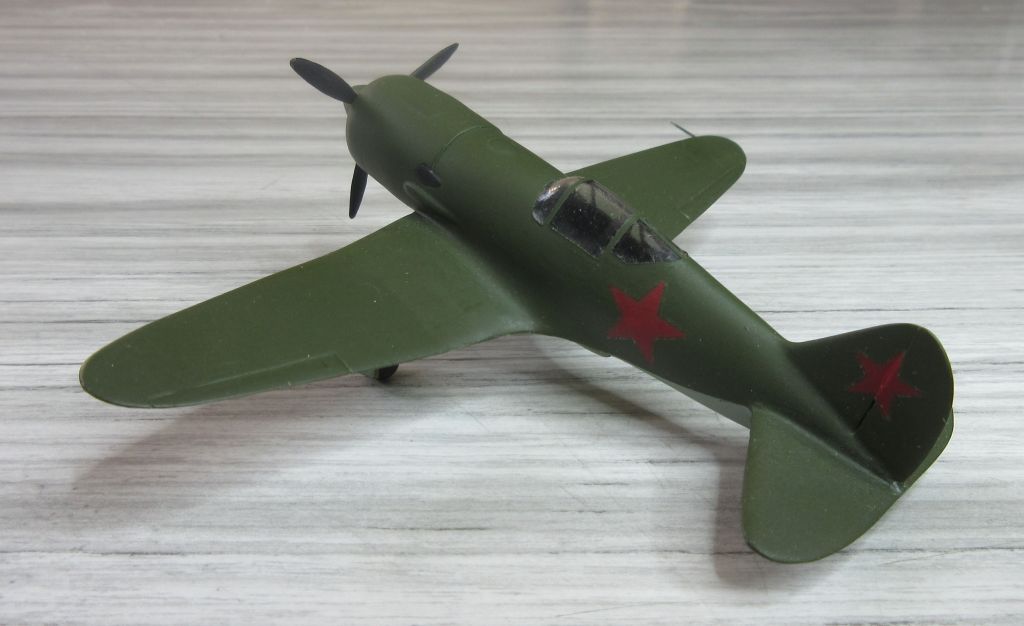
I paid $1 for this kit and it might be worth five times that much, but not much more. The copyright date on the box is 1993 but if this had gone on sale in the mid 1960s it would have been considered a fairly average kit for those times. The plastic itself is fairly brittle dark brown which reminded me of good old bakelite, the format of the kit was nothing out of the ordinary except that it had separate control surfaces – which you don’t expect to see these days – and the quality of the mouldings was fairly ordinary. There’s no cockpit interior (which you didn’t really expect in the 1960s), the canopy transparency is thick and ill defined and the decals are nothing to write home about. So why go to the trouble of making it? Well, I wasn’t going to until I found out a little bit about the aeroplane it represents and that got my creative juices (for lack of a better phrase) going. My searches through likely sources of information threw up a few paragraphs about the I-185 but no pictures or drawings to give me some guidance about what the final model should really look like so it was also a bit of an adventure. And besides, if the kit turned out to be too terrible to complete I wouldn’t have felt too extravagant if I gave up and tossed it in the bin.
Construction was straight forward and all the bits fitted, more or less, with a bit of careful urging and wielding of the knife and file. There were some fairly wide gaps between various parts of the wings, but nothing that generous dollops of filler couldn’t fix. The cockpit actually had an instrument panel but since there was nothing else you could call detailing there and since I had no idea what the cockpit of a real I-185 might have looked like I opted for the safety of good old flat black, again. The great deficiency of the kit is that it does not have an engine, just a flat panel at the front that the spinner and propeller attach too. I didn’t think this was a serious deficiency for a $1 kit but when all the main parts were together with a coat of grey paint to check for unsightly gaps the end result looked pretty and highlighted the problem with the nose. A quick rummage around in the spares box found an old radial engine of about the right diameter moulded nice and thickly so it could be filed down to the right profile. A little bit of sawing with the trusty craft saw and the nose came off the model but I found that if I wanted to keep the engine detail in the new nose I had to cut it off a little further back than I would have liked. The end result is that the nose of the model might be a few millimetres longer than it should be. But who is to know for sure?
With the new nose the model didn’t look too bad, making me wish I’d done something to improve the exhausts to replace the little lumps on the fuselage sides that are probably supposed to be the exhausts. The photo of an I-180S suggests that the exhausts may have been on the lower fuselage rather than above the wings so I really don’t know what would be the right thing to do. Anyhow, by then it was too late to do anything really worthwhile about it.
Painting came next. It’s not easy to find a good range of accurate colour paints these days so I was reduced to mixing my own to match the appropriate FS colours for a Russian fighter of that period. I’m not sure what colour the wheel wells should be but I see that a couple of other Russian fighters I made in 1987 have chromate green (more or less) so I trusted my earlier research and used the same colour again. The decal sheet is not very impressive but for a prototype aeroplane all I needed was red stars. The carrier film looked flimsy or non-existent so I brushed over a couple of coats of Microscale Decal Film and the decals settled onto the model better than I expected. Finally I sprayed on a couple of coats of matt varnish, attached the little bits like wheels and undercarriage doors (the main doors needed a lot of trimming to fit properly) and it was all done.
Not a bad little model in the end, but not really recommended for a fun time.