(October 2021)
When I first came across the F-Rsin company they were a little business that made respectable full resin 1/144 kits of obscure airliners. These days they offer also a range of injection moulded airliner kits and some airliner decals. Their injection moulded kits look as though they have come from the Mach 2 moulding machine and are challenging to assemble but their decals are close to outstanding. On the other hand, their range of full resin kits seems to be languishing and when I looked at their website recently most of their resin kits appeared to be out of stock, which is a pity because I like them a lot. Fortunately for me, I collected just about all of them when they were in stock so I can find them among my Treasure. This is where this kit came from, I don’t know if copies might still be available through ebay on occasions.
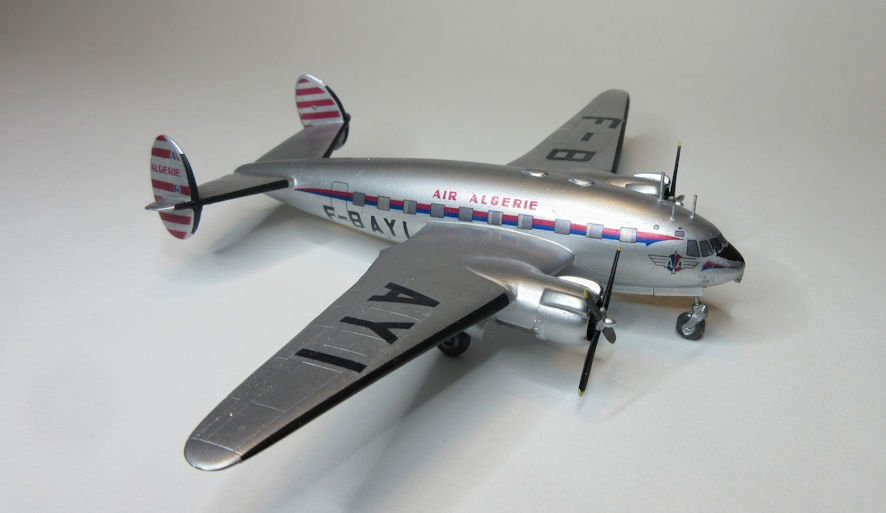
If somebody who is not used to these kits come into possession of one they might be disappointed because there is little of the detail that we have come to expect from modern day kits. There is little surface detail, no engine cylinders visible in the engine bays, the propellers are cast in white resin, not to the highest standard, and the undercarriage parts are also rather crudely formed. However, in 1/144 the detailing that is vital in larger scale kits is almost entirely invisible in this small scale, so why worry about it. A model made from one of these kits is never going to be of prize winning quality, but if you want a model of this fine looking little airliner this is the only kit of it in this scale. (There is a vacform kit of the Bretagne in 1/72 and I recommend it to you if you want to really test your modelling skills.)
The Bretagne is an attractive little airliner but it was a good airliner in the wrong place at the wrong time. It’s precise details are not clear but the design started in 1941, apparently to give the French Vichy government a transport aeroplane. The prototype was completed in 1943, then hidden to avoid destruction by allied bombing and it made its first flight in February 1945. This was not a good time to launch a new airliner with a flood of ex-military C-47 about to become available so it was not a commercial success. Air France, which ordered half a dozen, did not fly them and passed them on to its subsidiary airline Air Algerie. In all 45 Bretagnes were manufactured, the vast majority for the French military which ordered them to support the recovering French aircraft manufacturing industry.
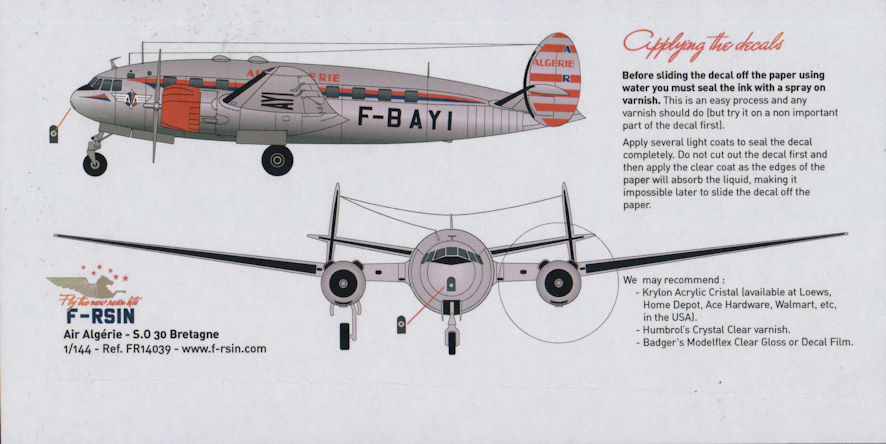
To look at, this is a simple little kit with four main parts – fuselage, empennage and two wings with engines moulded on. The remainder of the parts are the undercarriage and the propellers. There is a sort-of instruction sheet for the colours and livery but no hint of how the parts go together – as though any were really needed. However, I reckon that any modeller would need to find a few reference photos from the interweb just to make sure they had the details of the undercarriage right.
Assembly is simplicity itself, after a fashion. The parts for this kit were hand crafted and then cast in resin so that none of them is exactly square or with precise mating surfaced. Also there are no locating pins so they have to be made and holes for them drilled. – the main challenge here is getting the holes at exactly the right location so the two parts fit together without fuss, something that I’ve not quite mastered yet. All this means is that it is not easy to get the parts to fit together so a lot of jiggling is required to get everything to line up so that it at least looks square.
Next comes the challenge of taking care of all the problems with the resin moundlings. Don’t get me wrong, for the most part this is a very nicely moulded kit but it gets rough where the casting blocks have been hacked away at the bottom of the fuselage and on the wings. Lots of careful sanding is required here. Then there are the tiny air bubbles in the resin. This is not a significant problem with this kit but there are a few and they need to be cut out, filled and then sanded to the correct shape.
Having done all that you might think that you have a model ready for painting, and you’d probably be wrong. These days the experten recommend a coat of black paint to reveal the faults in your model and while that might be alright for military models it’s not so great for models that are going to be painted in bare metal or gloss white. Instead I’d recommend Tamiya rattle can AS-12 Bare Metal Silver which shows the truth of what your model is really like. What follows is more filling, sanding and polishing.
Now comes the fun part. I’ve become a fan of SMS lacquer paints and their Aluminum lacquer is quickly becoming one of my favourites that goes well on this model. I applied two light coats, waited for them to dry thoroughly and then gave them a light sanding to knock off any slight imperfections, and then gave the model a final light coat. It looked very nice indeed. But now the hard work began.
The Bretagne had those black de-icing boots on the wings and tail leading edges. The kit decal sheet supplies them but I’ve have no end of trouble before with these kinds of decals so I decided to mask and paint them instead. This is not terribly difficult but it is paintstaking in masking the thin leading edges and is best done using a great deal of patience. After an evening or two doing the masking it takes about a minute to airbrush on a coat of SMS Matt Black, a slight pause before applying another coat, then a short wait for things to dry before spending another five minutes removing all the masking. Have I every told you how much I hate masking.
All that remains to be done is the decaling and attaching the undercarriage and propellers. The decaling should have been simple but it was close to nightmarish. The instructions, such as they are, come with multiple warnings that the decals have been printed in ink and have to be protected by a layer of non-water based varnish. Normally I use a coat of Aqua Gloss Clear on any decals sheet just to be safe but that is water based so this time I had to use a clear lacquer varnish. The result was that as soon as a decal was placed in the model it started to curl up and in upon itself. After the initial panic I discovered that a combination of almost neat Aquadhere and oceans of Microsol could, with a great deal of gentle poking and prodding, induce the decals to go down and stay down, more or less. One of the decals got ruined in the process but fortunately I had made myself a scan of the decal sheet before, ‘just in case’.
When that was finally done I decided that really the decals were a little transparent and it would have been a good idea to overlay they with more decals to increase the colour density of the Air Algire livery. However, although I might have done that under normal circumstances, I was not willing to tempt fate with these decals where I had already so narrowly avoided disaster.
After all that attaching the undercarriage and propellers and stretching some sprue for the antenna masts was child’s play. This might not be an award winning model but if the judges knew how much effort had gone into getting it to look as good as it does it would have won something. In summary, if you are looking for an easy to build kit this is not for you. But if you’re looking for a model of this delightful looking little French airliner give this a go, if you can find yourself a copy.

brochure-2199-sud-ouest-bretagneDownloadworkbench-notes-2199-sud-ouest-bretagneDownload
