(November 2020)
From what I’ve heard on old blues records it appears that when people wake up in the morning they feel the need to dust their brooms. I’m not really sure what kind of dusting that means but anyway that’s not how I woke up the other day. When I woke up there was a simple, single thought in my mind, ‘Gotta make something big and blue!’ The link between Elmore James and the Unites States Navy towards the end of World War II is, of course, the word ‘blue’, and I thank my subconscious for making that link for me.
There are many shades of blue that we modellers use but the one I like the best is the one used by the US Navy during and after World War II. It started out being the top surface colour on USN aircraft a couple of years into the war and became the standard all over colour of all carrier based aircraft from mid 1944. There are a few reasons I like it. For one thing, it is a really nice looking colour and sets off the white of the American ‘stars and bars’ insignia of the times beautifully. For another things, it is the standard colour for some of the best looking aircraft to see service during and after the war including all the Grumman fighters from the Hellcat to the Tiger and, of course, the mighty Vought Corsair. Then there’s the fact that the French acquired a lot of US Navy equipment after the war, all painted in this colour, and the tricolour markings also go very nicely with that blue. Finally, it is a very simple paint scheme to apply, everything on the airframe is blue. I still recall the delight I experienced in walking around a corner in the National Air and Space Museum in Washington and coming face to face with a beautifully restored McDonnell FH, partly because it is a lovely looking aeroplane and partly because about the only parts of it that weren’t blue were the undercarriage oleo struts.
As far as I can tell this colour goes by several names including ‘Glossy Sea Blue’, ‘Deep Sea Blue’ and ‘Dark Sea Blue’. The origins of the colour seem to lie in the air war that the US Navy was fighting with the Imperial Japanese Navy during the Pacific War, usually far from land and over the deep waters of the Pacific Ocean. This theater was quite unlike other theaters of the war that were fought mainly over land so that green, gray and brown camouflages predominated. Over the waters of the Pacific blue was the most suitable camouflage colour. By the middle of 1944 the US Navy had also gained a high level of air superiority over the Japanese so that the earlier and more complex camouflage schemes were not necessary. So, if you want to make a simple but elegant and powerful looking model, something in Dark Sea Blue is the way to go.
With the hunt for something big and blue to build, and the riff from ‘Dust my Broom’ filling my head, I approached my kit collection, ‘There has to be something in here’, I thought, ‘that will do the job’. It was harder to find something to do the job than you might imagine. If I hadn’t sold my Matchbox kit of the Consolidated PB4Y-2 Privateer in a fit of stupidity some years back the search might have been more successful. As it turned out, the biggest kit I could find that fitted my needs was the Amodel 1/72 Martin Mars that I’d bought in another fit of the stupids a couple of years ago, but that was too big. I was tempted but when I had the thought the word ‘build’ I also had in mind the word ‘complete’ and that was a bit problematic when it comes to the Mars, in the short term anyhow. Next I found the Valom kit of the Martin JM-1, the US Navy’s version of the B-26 Marauder. That looked ideal until I looked in the box and found that the Navy had left their JM-1s bare metal or painted them yellow. It was a tempting thought for a later date, so that one went back on the shelf.
The next kit I came to was the Valom 1/72 Boeing XF8B-1. This is an ugly looking brute of a thing and most unappealing as a subject, but I had promised myself ‘big and blue”. I looked around some more and came across some more US Navy Dark Sea Blue aeroplanes, but mostly things like the F8F Bearcat, the F9F Panther and the F11F Tiger. But they weren’t as ‘big’ as the Boeing brute so I tucked it under my arm and headed back to my work bench.
For those of you who have not filled your heads with the minute details of US Navy aircraft (as some of us have), the XF8B was designed to meet a specification for a long range fighter bomber that could attack the Japanese Home Islands from carriers that were far enough out to sea that Japanese air forces couldn’t reach them. To achieve high performance Boeing fitted the biggest most powerful piston engine they could to huge fuel tanks and an internal bomb bay, all around a simple and rugged air frame, and the result was the F8B. Prototypes performed well but by the end of 1944 the US Navy also had the F7F Tigercat, the F8F Bearcat and the Douglas AD Skyraider near enough to entering service so it no longer needed the F8B. At the same time Boeing was keeping busy making and improving B-17s and B-29s so it wasn’t very interested in the F8B either, and the whole project slowly sank from lack of interest.
I gather that you can get the Valom 1/72 XF8B kit in two versions, one for the three US Navy prototypes and one for the single prototype that the USAF tested. I wouldn’t recommend the latter, the XF8B is uninteresting enough in Dark Sea Blue and I can only imagine that one in bare metal finish would be so boring to look upon as to drive one back to watching old episodes of McHales Navy.
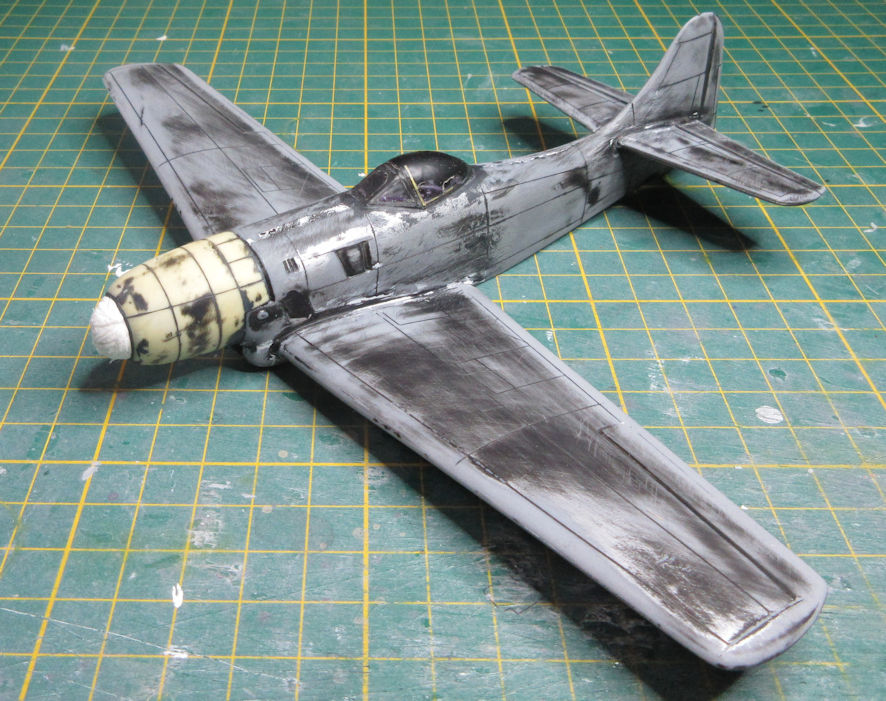
Opening the kit box is not an edifying experience guaranteed to fill one with happy expectation, perhaps reflecting the subject of the kit. There is enough plastic and it is as well moulded as one has any right to expect from a Valom kit, but there seems to be a lack of detail that you come to expect from relatively modern kits. There are some resin bits too for you to play with, a fair-enough instruction sheet, an annoying etch fret and bland decal sheet which is entirely appropriate for the markings the aeroplane had. The only real challenge from this kit – apart from nodding off from the boring nature of it all – is the cockpit. It’s as though they had enough plans and drawings to take care of the outside of the aeroplane but lacked any information about what went on in the inside so there is only a big hole in the top of the fuselage roughly where the cockpit canopy is supposed to go. You do get an interesting looking cockpit, though I don’t know how much it relates to the real thing, and one of those etch instrument panels which seems to be designed for some generic cockpit and has to be filed into shape to fit into this cockpit. But behind and before the supplied cockpit part there’s only a vast vacuum that, despite my initial inclination, I decided to fill. It was a bit of effort but probably worth the time and trouble that went into it because the rest of the aeroplane is so bland that your eye can’t help but drift towards it. The cockpit canopy is large and clear, being one of those vacformed ones that most people seem to hate but I think are okay, once you’ve figured how to cut them out of the celluloid without cutting away the tops of your fingers.
There are only a couple of other thing I should probably warn you about. One is the trailing edges of the wings that are of a record beating thickness once you’ve got the wing halves glued together. All I can suggest is that you set aside an evening and lots of filler (sprue goo might be best) and elbow grease to get that problem sorted out. The other is that the kit comes with a fairly adequate four row radial engine that you might be able to super detail, but don’t bother because you can’t seen anything of it once it’s inside the cowling with the big contra-rotating propeller on the front. The challenge is in getting it located inside the cowling at just the right spot because there are no locating marks and you have to figure out for yourself how far forward the engine has to go to give the propeller blades reasonable clearance from the cowling. Have fun with that.
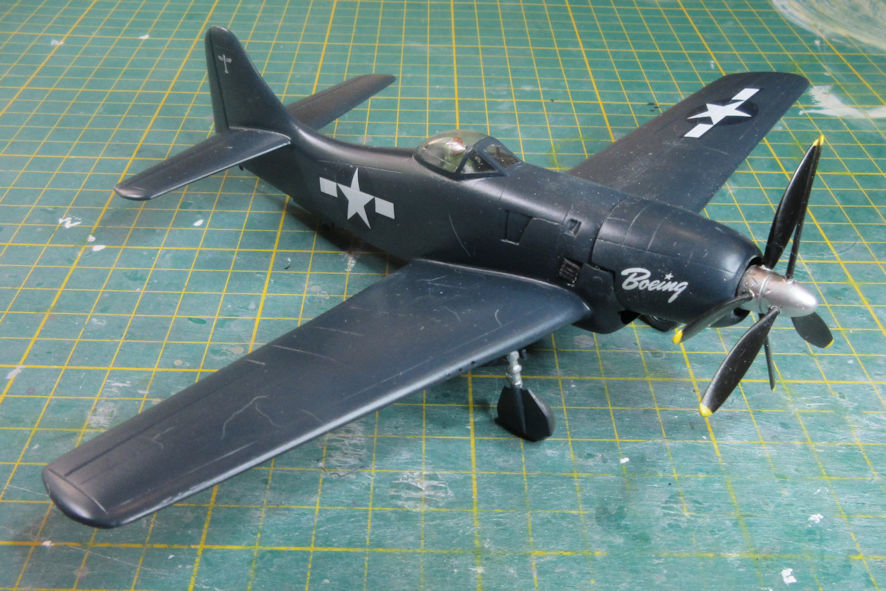
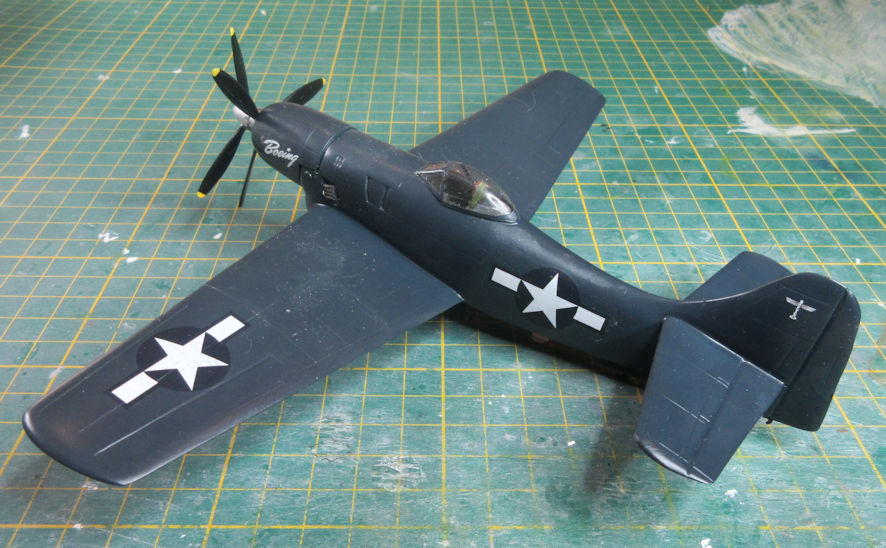
Having got all that sorted out, and the surface of the model flawless because any blemishes will show up almost as clearly as they will on a bare metal finish, it’s time for the easy part, the painting. A coat of black primer, I happened to have a bottle of MRP Black Fine Surface Primer which is okay but a bit runny for my tastes, a quick rub over with the finest Micromesh to knock down any last minute surface imperfections, and then a couple of coats of AK Real Color Dark Sea Blue. Then it’s a matter of sticking on decals and the final bits and pieces such as the propellers and undercarriage, and that’s it. Big, blue and on the ugly side of uninteresting.
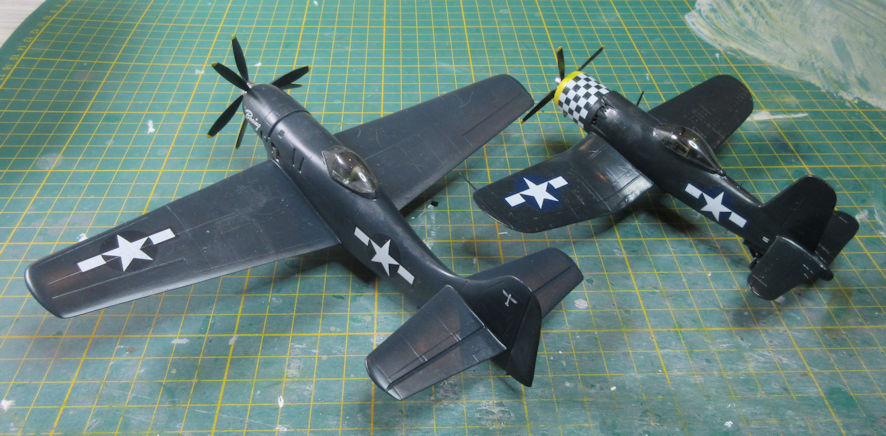
A final note on Dark Sea Blue. I thought that the AK Real Color Dark Sea Blue looked a bit too grey for my liking so I decided to try something new next time. This happened to be the Special Hobby 1/72 Goodyear F2G which is a more difficult kit to get together but also a much more interesting looking aeroplane. I bought myself a bottle of the SMS Premium Dark Sea Blue which, once applied, looks just a touch bluer than the AK Real Colors version so I will be using the SMS version in the future. Unfortunately I’ve still got the ‘blues’ when it comes to aeroplanes so I have a stack of more US Navy aeroplanes that you might expect to see completed in coming months.