(July 2021)
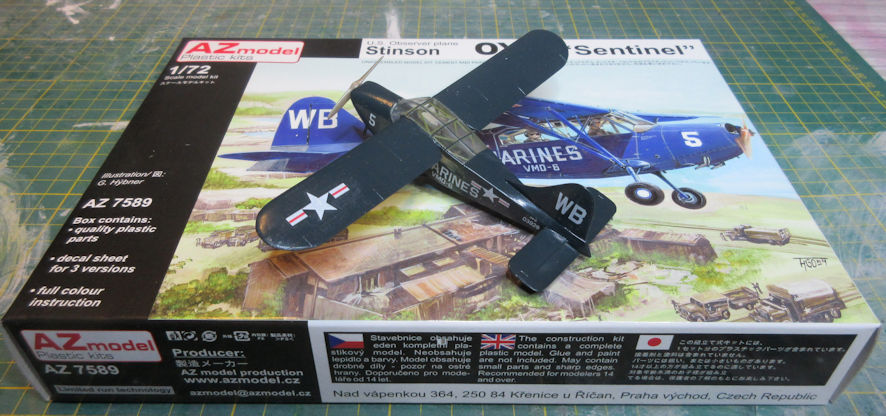
It started like this. I was out in my shed fondling some of the kits in my Treasure when I came across a box that caught my attention. It is not one of the world’s great masterpieces of box art but it shows a light aeroplane flying over a wartime scene, bearing the markings of the US Marine Corps and painted in the US Navy’s Dark Sea Blue. ‘Hmmm’ I thought and picked it up to take into my room where it would join the ‘might be made soon’ pile.
These past few weeks I’ve been working hard on getting all my Airbus A320 models finished and it is a fairly lengthy and sometimes tedious process. I was beginning to feel a bit bored by the whole thing and started looking for something simple and quick to build. I’d heard somewhere about the idea of the 48 hour build and thought perhaps that might be a good little holiday from the A.320s but I needed something that would be quick and simple to build. Looking over the pile of kits in my room I saw this kit which is small, simple looking and painted Dark Sea Blue, which can be applied quickly so long as you do the necessary amount of surface preparation. Despite the howls of protest from the other kits that had been sitting in my pile for much longer than this newcomer I took it out, opened it up and started work with the intention of having it completed in a couple of days. Oh human folly, had I but known what lay ahead. I’m not one for complaining but, for once …

The kit offers three decal options but the one that interested me was the Marine Corps one. The kit itself comes on one sprue tree with some transparencies and decals. The kit offers two fuselage options and the kit instructions tell us that you get the option of making either the L-5 (the USAAF designation) or the OY (the US Navy designation), in fact the USAAF version offered in this kit is the first version designed for observation (called the L-5A or OY-1) and the later is the utility version (the L-5B or OY-2). The kit instructions make this clear if you look at them long and hard enough, and the US Marines version was the OY-2 so that’s the way I went.
Before starting work on the construction process I had to begin by cleaning up the parts, which was tedious because there was small but annoying flash on almost every part. It wasn’t enough to be immediately noticeable but on a small model like this it was a tedious challenge and very annoying on the small and fragile parts like the framing that goes inside the canopy. Good luck with that if you decide you want to make this kit.
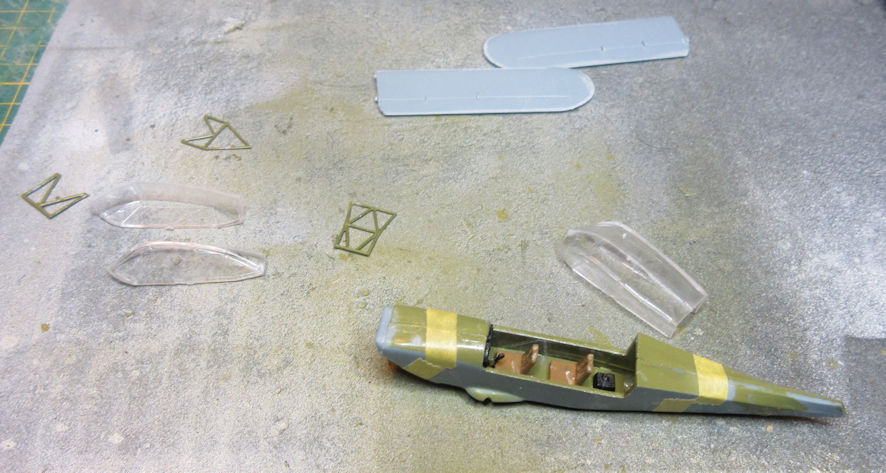
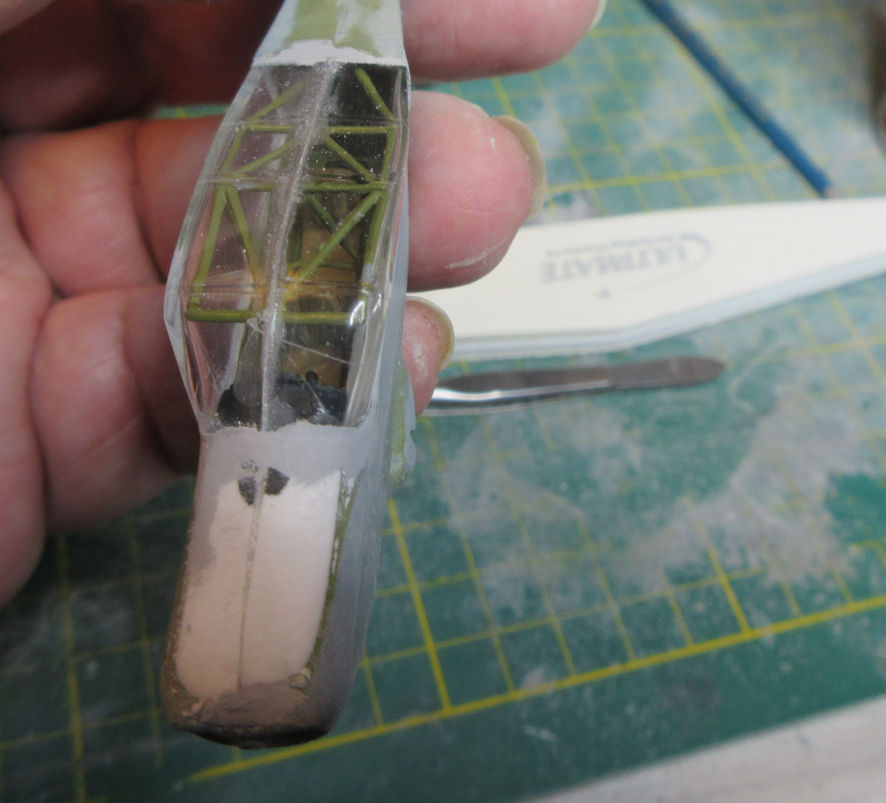
The first part of the business is the cockpit, which is simple enough and when completed slips easily into the fuselage halves, amazingly. The hard part is the cabin canopy and the cage that goes in it. The canopy comes in two parts which is necessary because of the way that it bulges out above the fuselage. Fortunately there is a frame line right down the middle of the canopy so the join can be disguised when the framing is painted. The instructions say to assemble the framework and then join the cockpit halves around it, which may have been a sensible move had I done it. Only after I had joined the canopy halves together did I realize that the reason for putting the framing in first is because it doesn’t want to fit after. More of that in a minute.
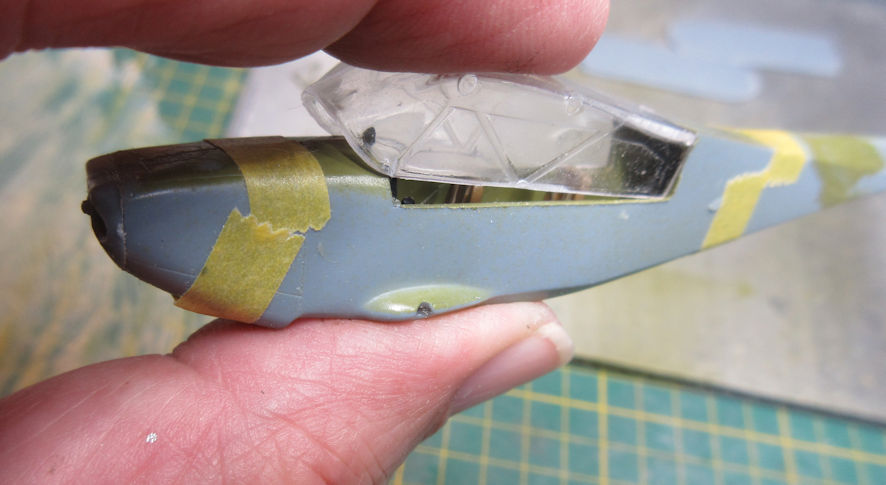
Having done a bit of detailing and dry brushing inside the cabin and with the canopy set and ready for use I discovered that the canopy doesn’t fit the fuselage. It is a millimeter or so narrower than the fuselage but far more alarming was the discovery that the front end of the canopy does not fit down onto the coaming at the front of the fuselage. After some head scratching I decided that the solution was to thin down the fuselage sides which was easily done – easier than I had expected. However, with the canopy seated properly it then turned out that there was still a substantial gap between the top of the fuselage and the bottom of the front of the canopy. Three options presented themselves. The first was to throw the kit in the bin and find something simpler to make. The second was to reduce the height of canopy so it fitted snugly at the front. The third option was to build up the front of the fuselage to match the height of the bottom of the canopy. Option one was the simplest and possibly the most sensible. Option two would have presented all kinds of ghastly problems with the rear fuselage and fitting the wings and option three would result in an inaccurate nose contour, but was the simplest. Anyhow, not many people know what this aeroplane looks like so I thought I might be able to get away with option three. So that’s what I did using some plasticard, superglue, filler and Mr Surfacer 500. It worked, after a fashion, but took a lot of time, so there went the idea of the 48 hour build.
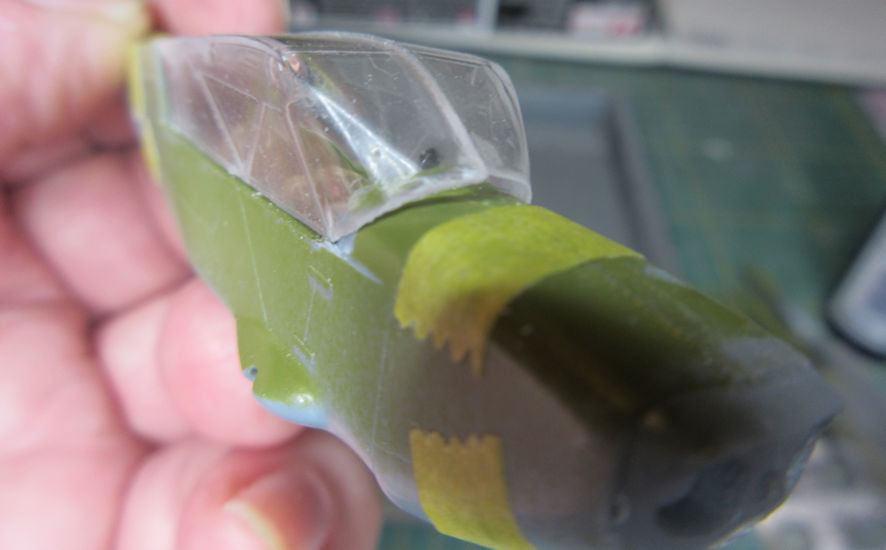
When that problem was finally resolved, as much as it could be, it was time to return to the problem of getting the framework inside the canopy without breaking it. Suffice it to say that I think my way of doing it might be better than that suggested by the instructions but make sure that you have a large supply of patience on hand as you test fit and sometimes trim the parts to fit and a goodly supply of harsh language on hand too to keep you sane through the process. Next is was time to glue the canopy to the fuselage, I’m old school and still use G-S Hypo Cement which works well for me but needs time to set. I used this time to advantage by having a good lie down to recover the trauma induced so far by this kit.
Next came the business of attaching the wings to the canopy. If you look closely you will see on the end of the wings two little bumps hiding in the flash which are supposed to fit into little indentations in the canopy. It is not too difficult to clean away the flash on the ends of the wings but when you try to fit them to the canopy you find that the little holes there are largely illusory and need to be enlarged or, more accurately, created. Since these holes are only the merest hints of indentations enlarging them is a process undertaken only with another helping of patience and harsh language – which were beginning to be in short supply by this stage.
Having finally got the canopy and the wings to agree to fit together fairly positively the next problem is fixing them permanently at the right angle. A search of the interweb revealed plans that showed the wings are set at a slight dihedral but the kit is a little lopsided (or I made it that way) so it was not possible to line up everything exactly as it should have been. In the end I decided to use the underwing struts as a guide, although the kit only indicates where they are to be attached in a minimalist fashion, with the result that the assembly doesn’t look too bad it you don’t look too hard.

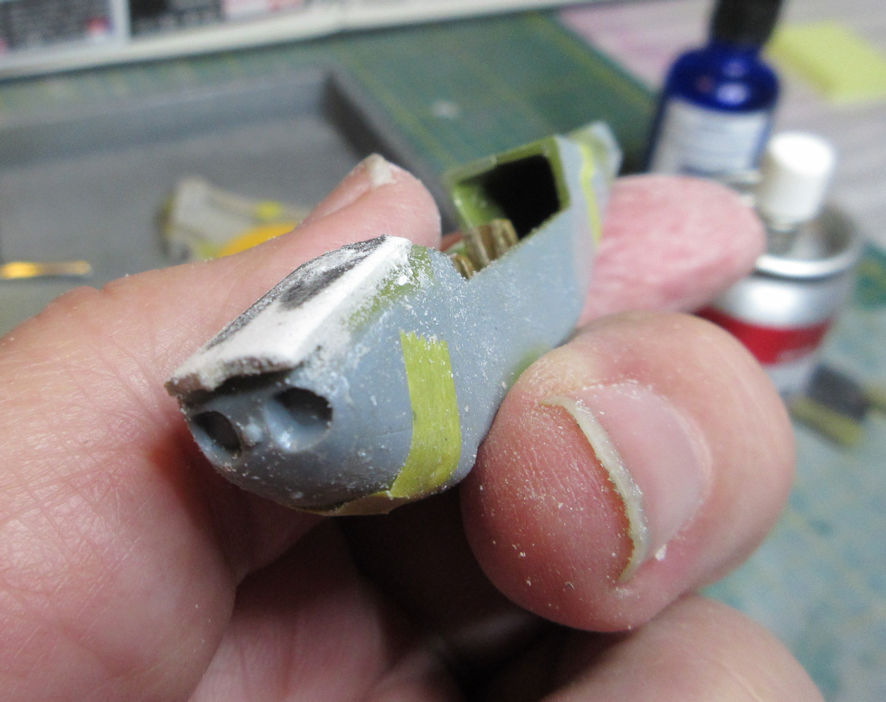
Next came the tail assembly which I didn’t find terribly difficult because I’ve made enough of these kinds of kits to have on hand some craft wire to use to add some strength to these joints. If you haven’t done this kind of thing before it is another occasion for the patience and harsh language. Get used to it.
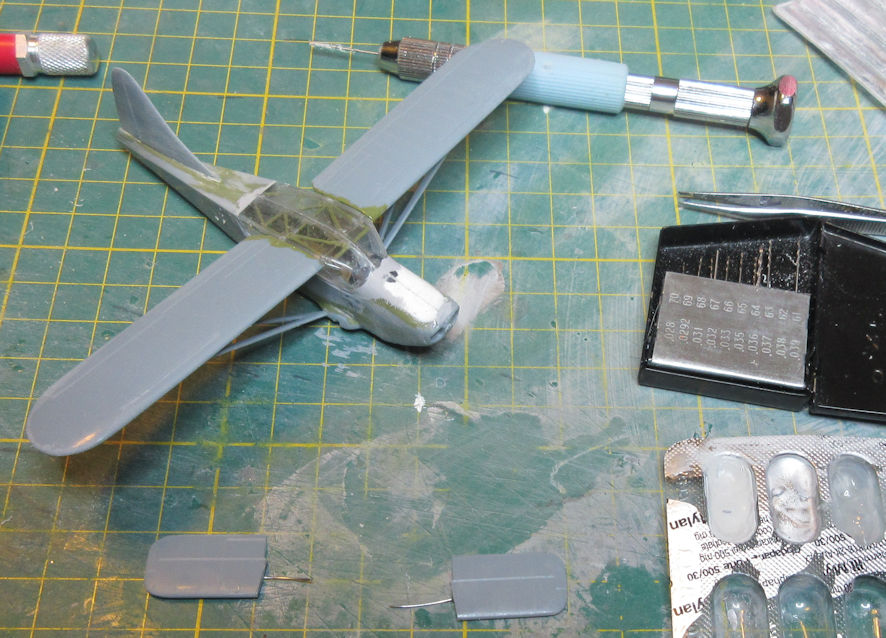
The final part of the assembly was the undercarriage legs. Fortunately the little holes moulded into the fuselage sides are large enough so that no locating pins are necessary. Since the wings were not quite right alignmentwise I decided to make sure that at least the wingtips of the model were the same height from the ground. For this I have a special tool which is a stack of old and no longer needed burnable DVDs and I found that eighteen of these under each wingtip gave them the right height. Then all I did was use some good old Revell Contacta glue to attach the legs and fiddle with them until they lined up with the bottom of the legs resting on the table where I left them until the glue had set. Now they are not precisely square but the overall effect of the model is not too alarming.
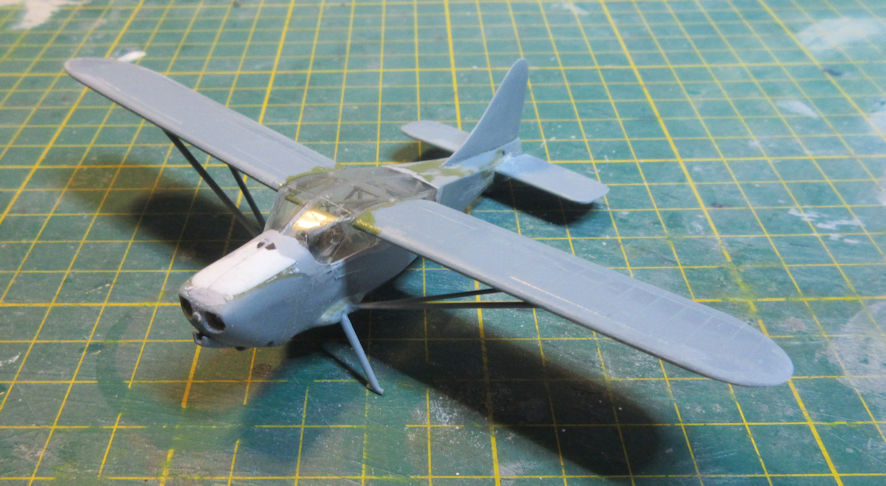
With all that done and set, masking and painting went next. A word of warning, the painting guide on the back of the box would have you think that all three options are for L-5As or OY-1s but the canopy for the OY-2 is different and so the masking needs to be different. The vague indentations in the canopy plastic suggest this but the box painting and photos you can find on the interweb give a fair indication of the framing for that canopy. As usual this is painstaking and tedious work, and aeroplanes like this have a lot of it. There’s little option but to go to all this trouble is you are unfortunate and have made it this far with this kit.
I reckon that the SMS version of the US Navy’s Dark Sea Blue is the best of the current batch of modelling paints and I really like the sheen that this paint has when it has dried and set on the model. If you haven’t tried any SMS paint it’s about time that you did. However, because of that sheen it is necessary to make sure you’ve prepared the surface to get rid of all the glue, paint and finger marks with some fine grade wet and dry and preferably some Micromesh. For this model I gave it a coat of SMS black primer, sanded it back with 4000 grit micromesh, another light coat of black primer, then one coat of SMS Dark Sea Blue, then a light sanding with 8000 grit micromesh and then a final coat of Dark Sea Blue. The lacquer paint is dry to touch almost instantly but it is best to leave it for a few hours to set fully before handling the model. Some touching up is always required after so much fiddly masking but this time some of the fine framing pulled off when I lifted the marking so I had no alternative but to replace it all with some 0.4 and 0.7 mm Azur masking tape painted Dark Sea Blue, which looks a whole lot better than my first attempt to be truthful about it.
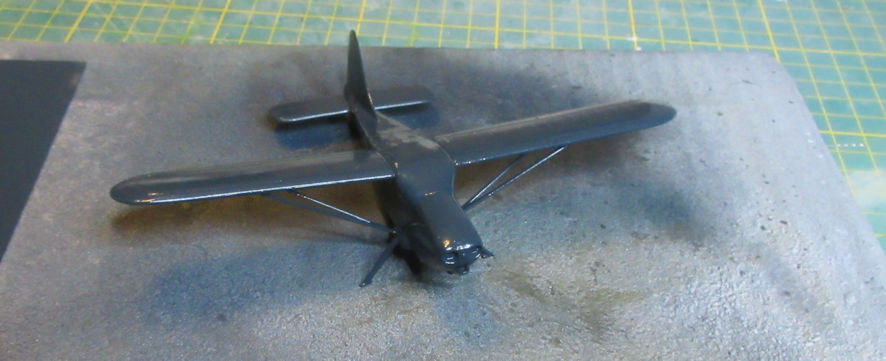
Finally the model was ready for decals. The sheet supplied in the kit is very nice and the decals are thin and easy to work with. But printing white decals on almost white decal sheet paper is enough to give modellers like me nightmares. All that remained to be done was to attach the wheels, the propeller and the exhaust pipes. Here the kit made one last attack on my sanity when one of the tiny exhaust pipes went sailing off while I was trying to get the flash off it. The carpet monster ate it so new exhaust pipes had to be made from some spare plastic rod.
The end result of all this struggle is actually a pretty little model. The Dark Sea Blue hides some of the flaws in it but, by all the modelling gods, I wish that making this model had been as simple and pleasant as I had hoped it would be. And as for getting it made in 48 hours, don’t make me laugh!

brochure-5543-stinson-oyDownloadworkbench-notes-5543-stinson-oy-1Download
