December 2021
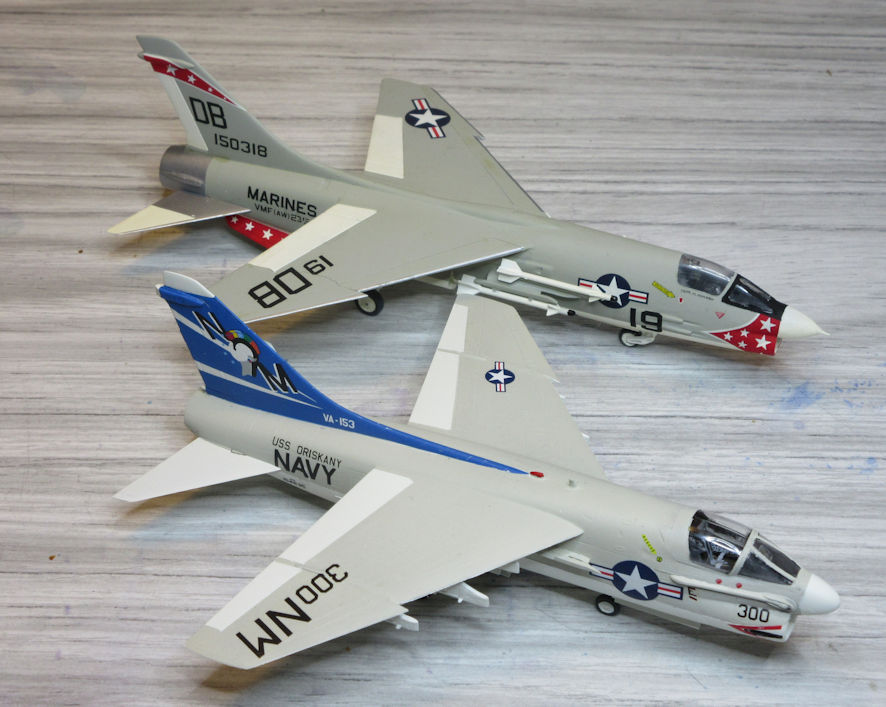
The Vought A-7 looks as though somebody did something terrible to a Vought F-8 Crusader. It is basically the same shape but the miscreant squashed the poor F-8 and then attacked it with a bicycle pump. No wonder it got the nickname ‘Short Little Ugly Fucker’. Of course, that was the point of the A-7, to fuck up people’s day by dropping a lot of high explosive on them. And it looks kind of right for that role.
Perhaps the fates had decreed that I should never make a model of such an affront to aeronautical beauty, but I ignored the portents and here we are. For many years I’ve had the Fujimi kit of the A-7A and some ancient Microscale decals to apply to it but when the time came to finally put the kit and decals together I made a total mess of the kit and it ended up in the bin. It would be hard to say what went wrong, perhaps a series of little mistakes that added up to one undeniable disaster, and in the end there was no hope of making a model that even I would be happy with.

Having become obsessed with the idea of making an A-7 I ordered another A-7A kit over the interweb, this time the relatively recent Hobby Boss kit. This kit dates from 2007 and by then that company has a fair idea of what it was doing when it made this kit so it is fairly comprehensive and nicely moulded. The pedants who write on the interweb seem a little unhappy with aspects of this kit but it looks okay to me. In the box you will find a sprue or two heavily laden with things to go under the wings which looked enticing, but since I didn’t want them to detract from the look of the model the went straight into the spares box.
When it comes to construction there are no real challenged in this kit. The pieces go together well and there was very little need for filler. The only addition I made was a set of aftermarket seat belts because the cockpit canopy is large and clear so you can see what’s inside easily. Personally I found the kit instructions a little unclear in places and I think I might have made a mess of the nose undercarriage as a result, but it’s not too obvious is you don’t pick the model up and peer into the wheel bay. Apart from that, the only aspect of the kit I was less than happy about was the decal sheet which offers two options, neither of which were particularly inspiring, and this is probably where I fell out of love with this kit.
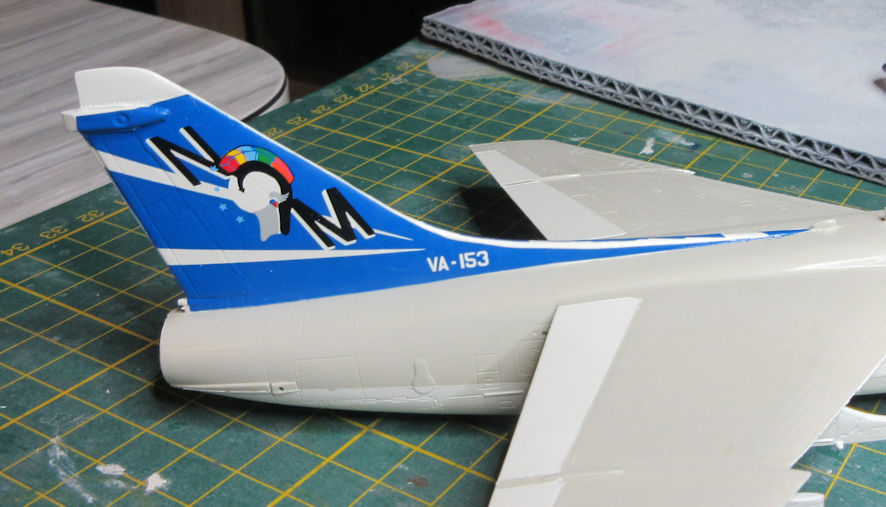
Back in the 1960s and 1970s the US Navy painted their aeroplanes in some really attractive schemes but the kit offers two rather drab options so I returned to my long treasured old Microscale decal sheet, 72-218 which is for some aircraft of CAW 12 including an attractive blue tailed A-7 of VA-153. The basic colours for US Navy aircraft in this period were Insignia White and Light Gull Grey and these days SMS offer both colours so I decided to use them. The grey might be a little on the light side in comparison with other Light Gull Greys I’ve used but it’s still in the right area, I think. In planning ahead I decided to paint the whole of the tail fin white even though the Microscale decals would entirely cover it and so, after a bit of tedious masking and painting, I had an A-7A ready for decalling. Since SMS lacquers are gloss there is no need for a gloss coat prior to decalling if you like to do that kind of thing..
I really wasn’t too surprised when I found that the tail decals, which had probably been designed for the Fujimi kit, didn’t fit the Hobby Boss kit, leaving a white stripe three or four millimeters deep on the leading edge of the fin. The problem was, what to do about it. None of the paints in my collection quite matched that shade of blue and my attempts to mix the paints I had to the right shade were not quite right. The solution came from raiding some of the other decals on the sheet that were the same shade of blue, but there wasn’t much blue decal so I had to be very sparing in how I went about cutting out the sections of blue decal and applying them. After some experimentation it seemed that little sections about one or two millimeters in size worked best but to be sure it all went well I stuck them down with some diluted Aquadhere and splashed a lot of Microsol over them, doing only a few most nights and then setting the model aside for them to set and dry. Even painting the wheels on a 1/72 PzKpfw IV is a walk in the park in comparison, but the end result is almost worth it.
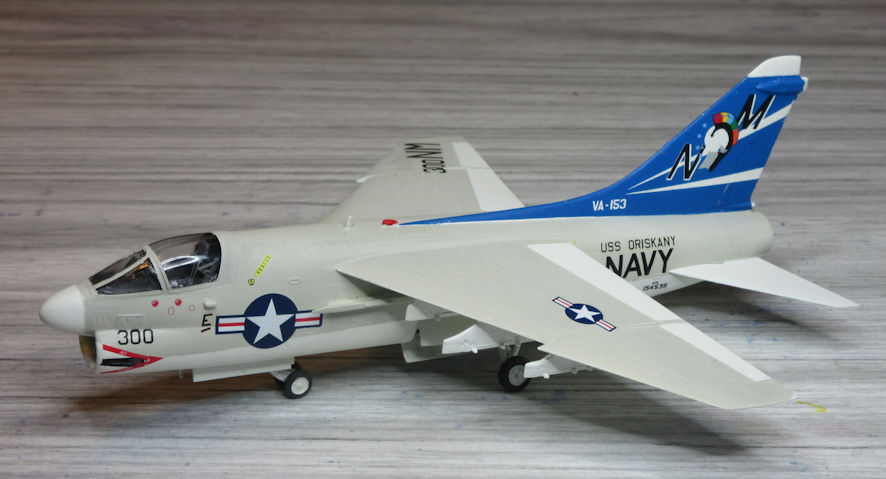
The Microscal sheet doesn’t come with the markings that appeared on all A-7s so I decided to use what decals there were on the Microscale sheet and then take the rest from the kit decal sheet. Unfortunately, the Hobby Boss instructions and those from Microscale do not agree on some of the placings and photos of VA-153 A-7s show there was some variation over time. The result is that the decal placing on this model is, shall we say, less than optimal. My inner pedant did emerge for a moment or two and I went to the trouble of making sure that the model’s Bureau of Aeronautics number does match one flown by VA-153, through the agency of my scanner and computer software.
To summarize to this point, the project was going alright, but far from perfect. As a result I was not very interested in putting any more effort into it than was necessary to get it off my work bench. I’m sure I read somewhere that, on US Navy aircraft, the Light Gull Grey was matt and the Insignia White was gloss. Getting this right would have taken more effort than I felt interested in investing in this model – and we all know what can happen when you mask over decals – so I simply the gave the entire model a light coat of SMS flat varnish. Later I thought that a semi-gloss finish might have been a better compromise, perhaps.
It wasn’t far to the finishing line now. Off came the cockpit canopy masking, to reveal where the paint had leaked under the masking and where paint pulled away, so there was some more increasingly tedious touch-up work. Finally all that remained was to attach the undercarriage wheels and doors. The kit provides tabs on the doors that slot very nicely into the fuselage to give the doors just the right angles, but the parts fit is so snug that a few coats of paint mean they no longer fit and so they have to be cut off to attach the doors. This requires a great deal of peering at photos to try to get the door placement as accurate as possible.
If there had been any more work needed to complete this model it might either have ended up sitting at the back of my ‘in progress’ shelf or found its fate in my bin, again. As I said, perhaps I wasn’t fated to make a model of the A-7, not a good one that I’m happy with anyhow. Still, it’s finished and that’s that. Perhaps I will smile upon this little model more fondly in a couple of years when I’ve forgotten what I don’t like about it now. That’s usually how it works.

workbench-notes-5891-vought-a-7aDownloadbrochure-5891-vought-a-7aDownload
