(November 2009)
From the inside I’ve had enough of Boeing 737s in this past year, but from the outside they come in such a variety of shapes, sizes and plumages that it would be hard not to find them interesting. From a leftover thought from Boeing 707s and 727s they’ve become the most popular and numerous airliner in the world, which makes them interesting from a historical point of view as well.
There are three classes of Boeing 737. First off there was the 737-100, a tubby little thing with a couple of turbojets under the wings. The -200 was much more popular because it’s stretched fuselage carried enough passengers to make it a profitable aeroplane to fly. The last time I flew in or saw a -200 was in the United States in 1993, and even then I was amazed that they were still flying the things. Still, it was on a shuttle service to Alabama, not that I’d ever say bad things about Alabama because you never know where their spies are.
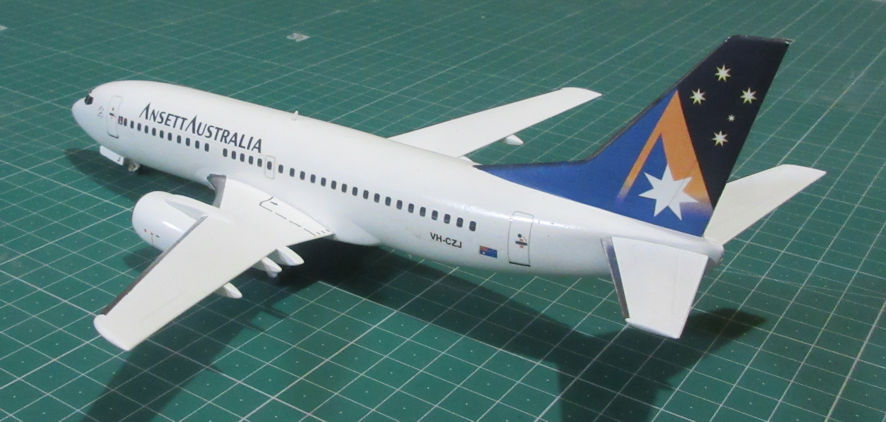
Next came the 737-300, -400 and -500 series which are called ‘Classic’ these days. They all have the same new wings but different fuselage lengths which means that they have different payload and range capacities, which doesn’t mean much when you’re making models of them but does effect the plumage you can give them because airlines buy them for their payload and range capacities. We’ve had -300s and -400s in Australia, as far as I can remember Ansett flew both versions and Qantas is still flying them on some routes, particularly to places like Canberra, which is the reason I’ve become so familiar with their interiors this past year and I don’t find them particularly comfortable.
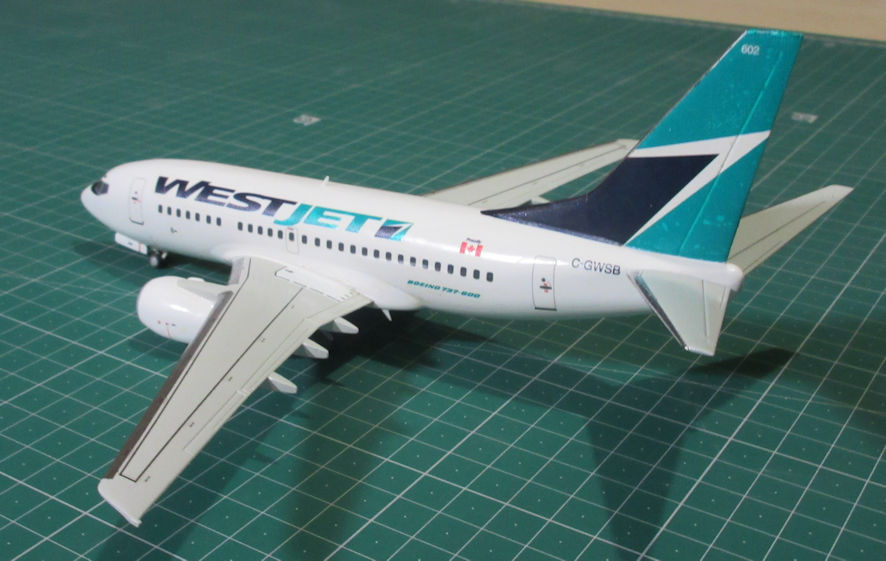
Finally there are the Next Generation versions, the 737-600 to the -900. They have new engines and wings but the fuselage is the same width as in earlier versions, but comes in a variety of lengths. You will see -700s at most Australian airports in Virgin Blue plumage and -800s in Qantas colours, they are a bit more comfortable to fly in because they do the long flights to Perth and so have a tiny little bit more space for the poor passengers.
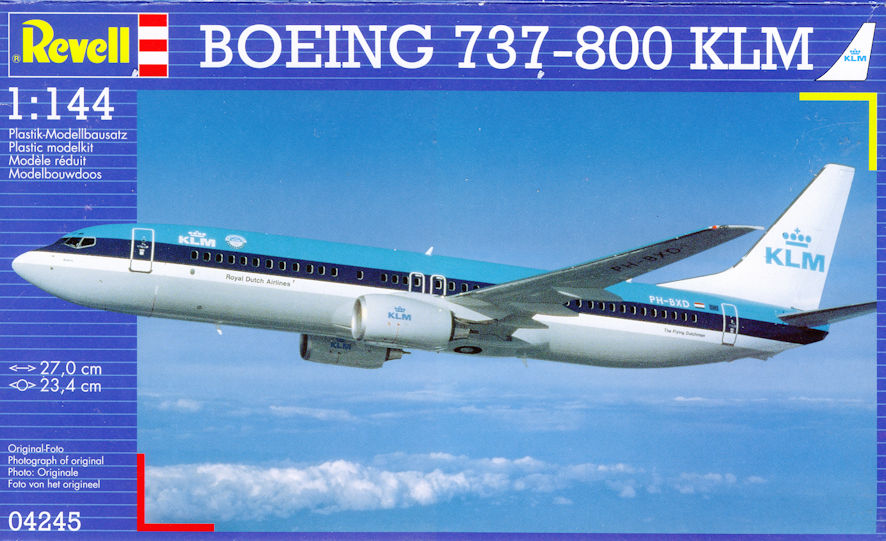
Fortunately for modellers, there are kits of all three basic versions in 1/144. Airfix does a nice little -200 which has been around in decades. All you have to do to turn it into a -100 is cut plugs out of the fuselage before and after the wings. Minicraft makes a ‘Classic’, apparently in either -300 or -400, but I can’t say that I’ve noticed. As the only difference between the three ‘classics’ is fuselage length it is not hard to make all three. Revell do a gorgeous 737-800 which is as good in quality and fineness as most 1/72 or 1/48 kits, and you can find versions with or without the fancy wing tips. Since the only visible difference between the four versions is fuselage length you have to take plugs out of the fuselage to make the -600 and -700 and you can add some of that spare plastic to make the fuselage of a -900. It all seems very simple, doesn’t it?
It probably would be too, it I wasn’t such a fussy modeller. Not as fussy as some members of our club to be sure, but still fussy in my own way. While the wings of the three different kinds of 737 are different, that is only to be expected. However, there are differences in the fuselage shapes as well, in particular the pinched in nose that is best portrayed in the Revell 737-800. To overcome this … (Read on in a future issue.) Leigh
(December 2009)
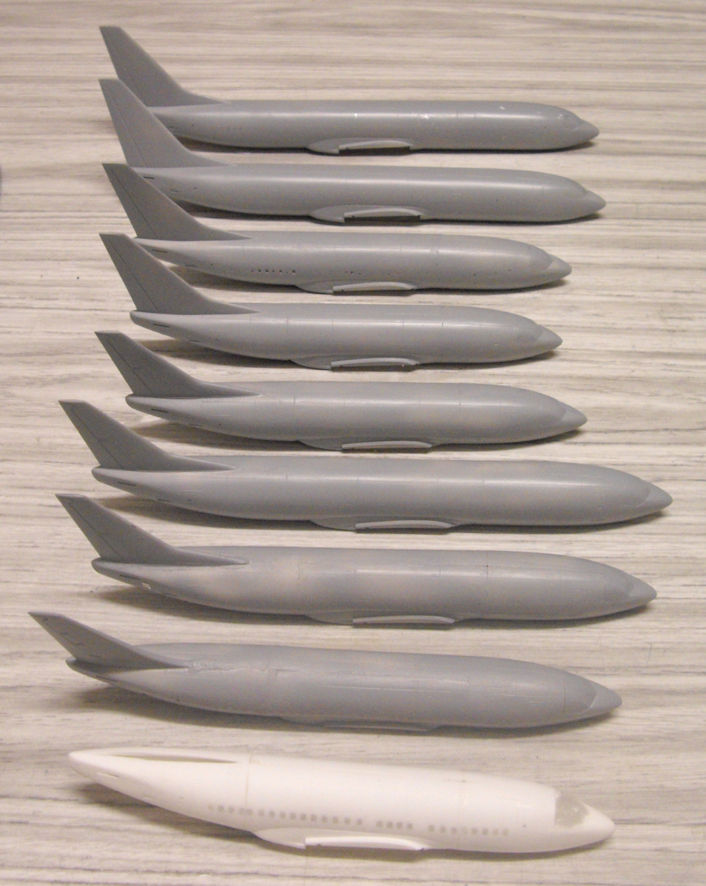
To overcome the problem of three different fuselage shapes of the three different 737 kits the simple thing is to convert one basic shape to all nine 737 versions. The best kit, and the most readily available, is the Revell 737-800 kit but obtaining nine of them would not be easy or cheap, except for the fact that several years ago I acquired from the United States four or five kits in their plastic bags without instructions, decals or box at a good price and Airline Hobby Supplies were selling a version of the Revell kit at a good price, so I got four more to complete the set.


All that had to be done now was to cut them all to the right length. You can either do this by calculating the right length based on the length of the full scale thing or you can do it by counting the windows from photos of the real thing. Having to calculate how much length to lose from ahead and behind the wings makes the process a bit more complicate but eventually I worked it out to my satisfaction – being arithmetically challenged adding a touch of excitement to the exercise. The old woodworking adage of measuring twice before cutting proved to be worthwhile on a couple of occasions. The only fuselage that doesn’t need cutting is the -800 and the -900, which is longer, can simply be made by using one of the many leftover bits from the other, shorter, models.

Several years ago I made a model of a -100 to see if this project was actually doable, but I made life difficult for myself by keeping the windows open as well, which involved cutting the fuselage to the right length and then cutting out the rows of windows and cutting them to create the right row of windows for that version without any of the gaps that appear in later versions, and gluing all this together. It was a lot of hard work and I simply filled in the windows this time around – life is too short. Besides, most decal sets these days come with the windows included, so why fight the inevitable.
The next thing to do is acquire two Airfix -200s and three Minicraft -300s for the wings and tails. Cutting off the appropriate tails from the kits and attaching the right shaped tails to the right length fuselage is another of those cases of check twice before gluing once.
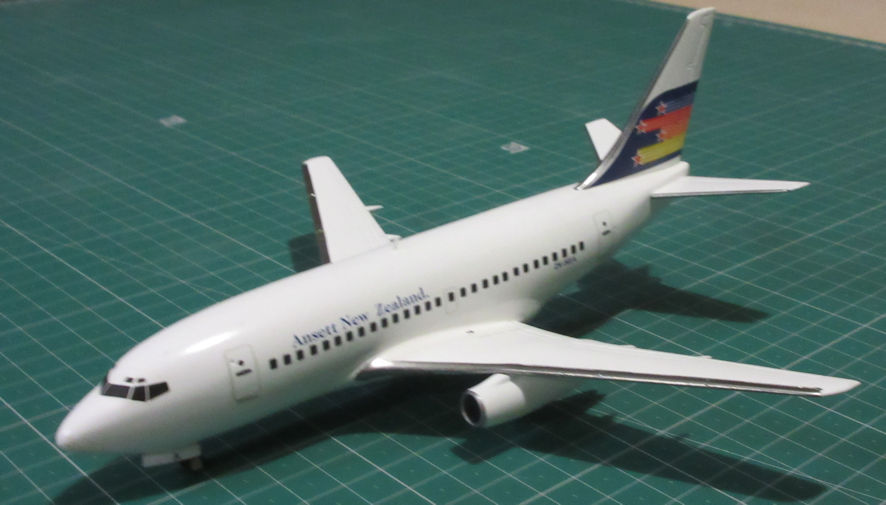
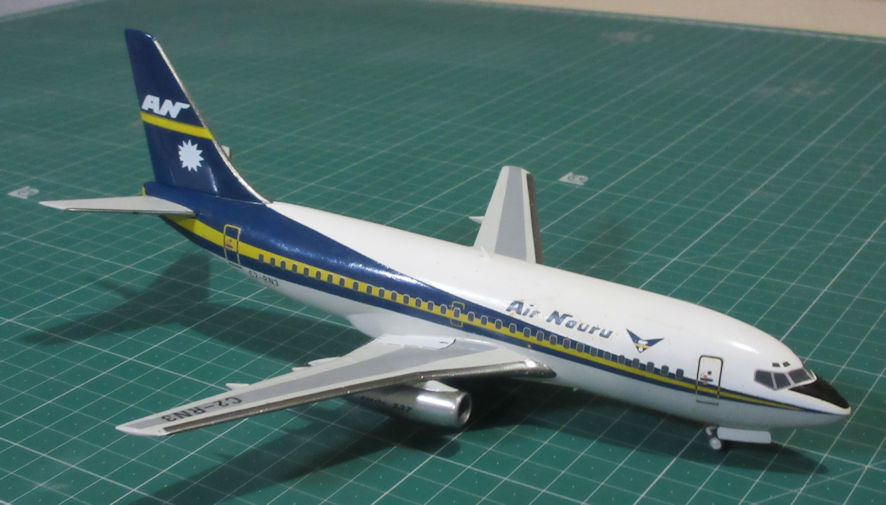
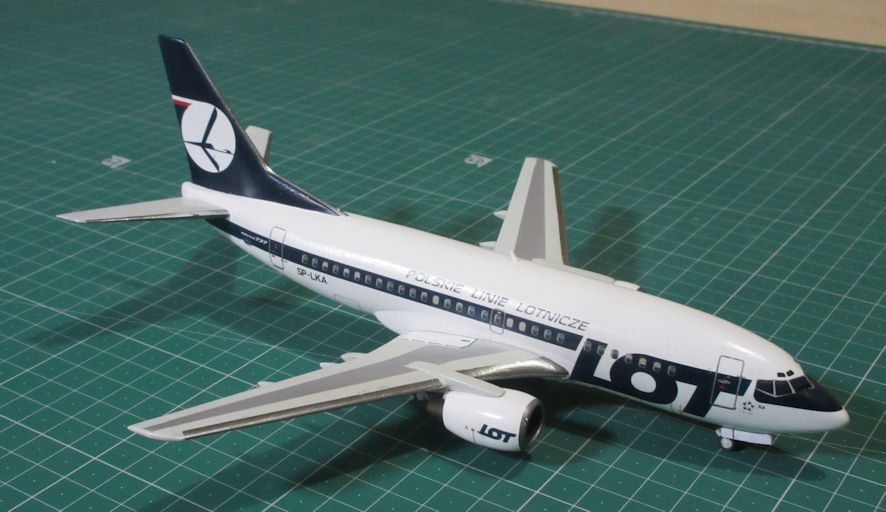
Having got to this stage it occurred to me that it would be a good idea to work out which airlines to make these models in. It only occurred to me after I’d made the fuselages that it would be a problem if decals were not available for some of the more obscure versions, the -500 and the -600. Fortunately good ol’ Aviation Hobby Supplies has just about everything you could want for this project including more decal sheets than you could imagine. I’d also acquired a few sheets over the years as well, including a Hawkeye sheet for an Ansett New Zealand -200, which can also be used to make a -100, and old sheets for NAC and Air Nauru -200s. It would be hard to say which of the two is the most obscure but in the end I chose the Air Nauru decals because it was a simpler paint scheme.