(December 2021)
Eighteen years ago I made four models of the Airbus A.330 and A.340 using the Revell 1/144 kits, the shorter -200 and longer -300 versions. (You can read about it in the column on the right.) That was fairly much at the beginning of my entry into the world of airliner modelling and I did a number of things then that I wouldn’t do now. So, almost a couple of decades later and with some experience behind me, I thought it might be time to have another go at making models of the Airbus A.330.
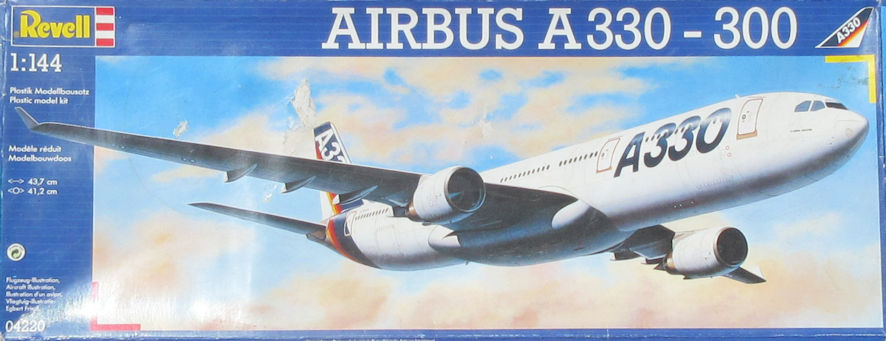
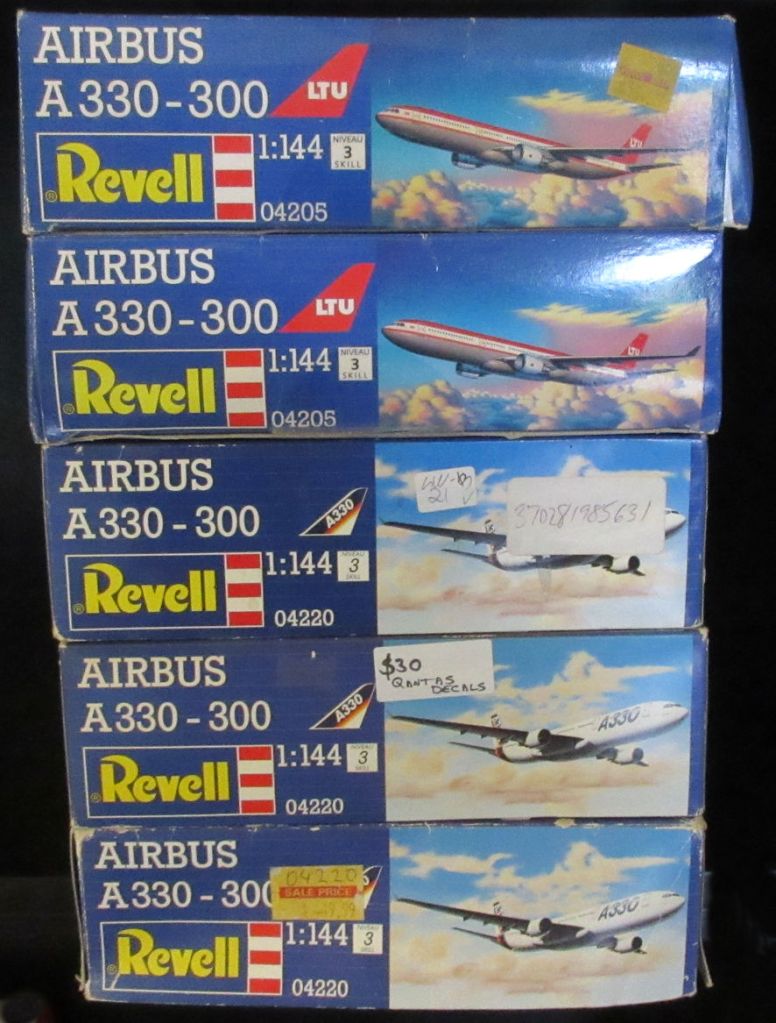
The Revell kits remain exactly the same as they’ve been since they were first released back in the early 1990s and all the kits I’m using in this project were picked up at swap and sells over the past decade or so. There are plenty of new decals around but their method of application hasn’t changed substantially in decades so about the only thing that has changed in the past couple of decades is the paint to be applied to them and my experience in making airliner models. Let’s see if there’s been any improvement there.
The Plan
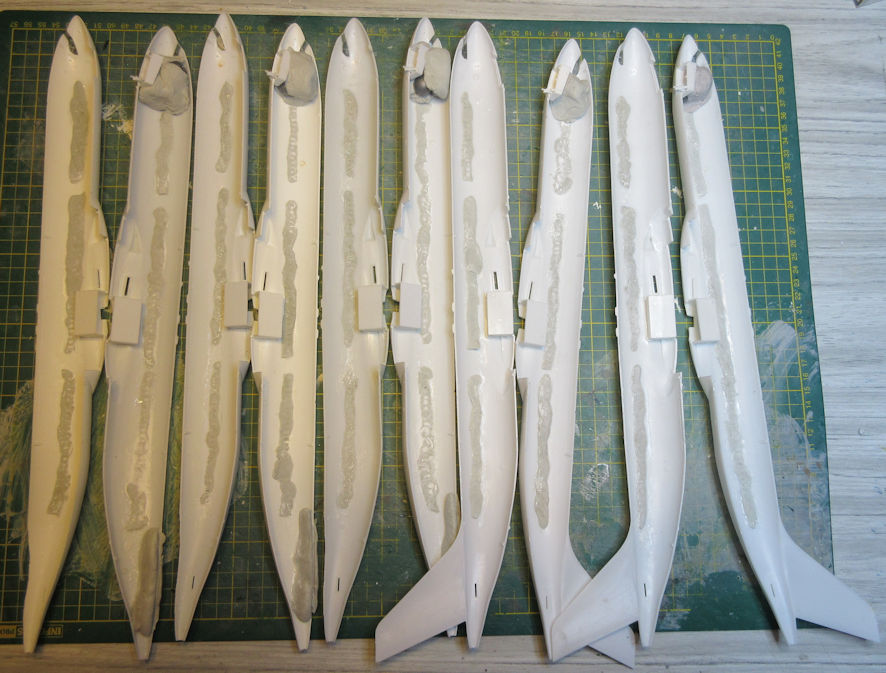
It is always good to start a big project with a plan, so here it is. I have five Revell 1/144 Airbus A.330 kits. All of them come with the General Electric CF6 engines as standard, one comes with the Pratt & Whitney PW4000 engine sprue as an addition and two come with the Rolls Royce Trent 700 engine sprues as additions. To some extent this dictates the versions of the A.330s I’m going to make although there are after market Trent engines available if I need them.
The kit comes in the A.330-300 version but the conversion to a shorter A.330-200 is relatively simple and involves taking slices out of the fuselages before and after the wings and replacing the kit tail with a larger aftermarket -200 tail. These modifications present no problems, providing that you know what you are doing and are careful about it.
At an early stage in the planning I thought I might make one of these kits into the Royal Australian Air Force KC-30 air tanker for which I had picked up the conversion parts. This seemed appropriate as these aircraft were converted from ex-Qantas A.330-200s. However, I lacked the decals to make this conversion and, anyhow, it would be a pity to finish such a fine looking airliner as an A.330 in the RAAF’s dull grey paint scheme.
The key decision was in what liveries the models would be completed. The decision on three of them was straight forward, I already had Hawkeye decals for a Qantas Citylink A.330-200, Ric Warcup decals for a Virgin Australia A.330-200 and Hawkeye decals for a Qantas A.330-300.
There was almost too much choice in what liveries to make the other two A.330s but that was constrained by the kinds of engines available since the Qantas A.330s have GE CF6 engines and the Virgin Australia A.330 has Trent 700 engines. This left me with the choice of one airliner with Trent 700 engines and the other with PW4000 engines. The other constraint is that if I can’t make my airliner models in Australian, New Zealand or Papua New Guinea liveries I like to make them in the liveries of airlines flying in the Asia Pacific region so they may have flown into Australia. It would also be nice if one of them was a freighter. After much searching through websites of decal merchants I found the two decal sets that met my needs, a 8A Decs sheet for a Fiji Airways A.330-200 with Trent 700 engines and a Draw Decals set for the Air Hongkong/DHL A.330-300 freighter with PW4000 engines.
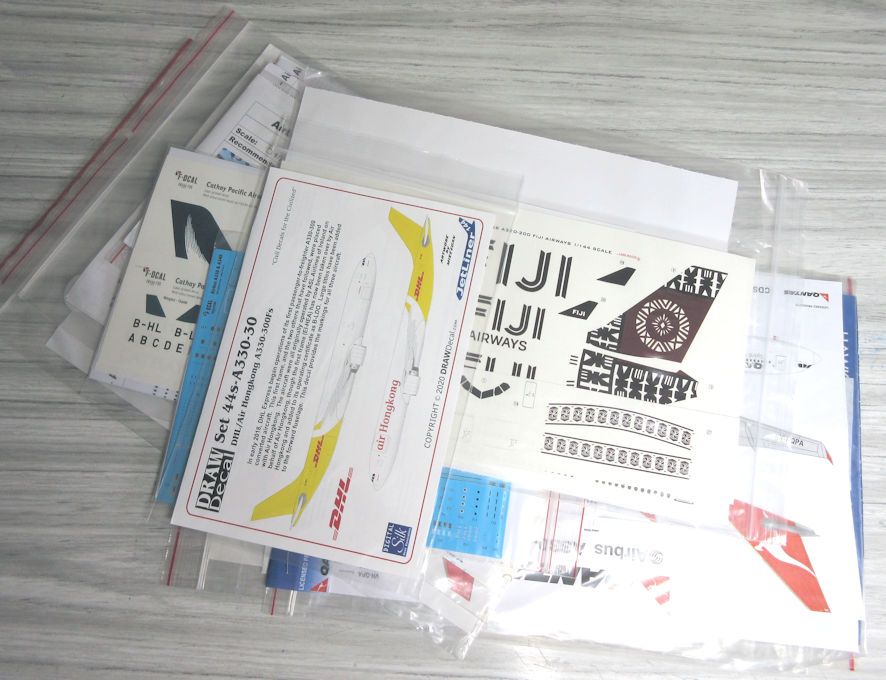
One more decal decision had to be made. Although each of these A.330s wore different liveries they all had the same windows, wing walkways lines and smaller details, but each of the decal makers portrayed them slightly differently in their decal sheets. So that they looked identical in these details it was necessary to buy five sheets of detail decals as well. After a lot more hunting around on the internet I decided that the F-Decals sets were the best and ordered five of them. They came with liveries for various airlines as well, which might prove useful if anything goes wrong with my Grand Plan.
So, if everything goes according to plan the result of this project should be five completed A.330 models. They should be A.330-200s in the livery of Qantas Citylink, Virgin Australia and Fiji Airways, and two A.330-300s, one in the livery of Qantas and the other a freighter in the livery of Air Hongkong/DHL. Let’s see how it goes.
The Work Begins
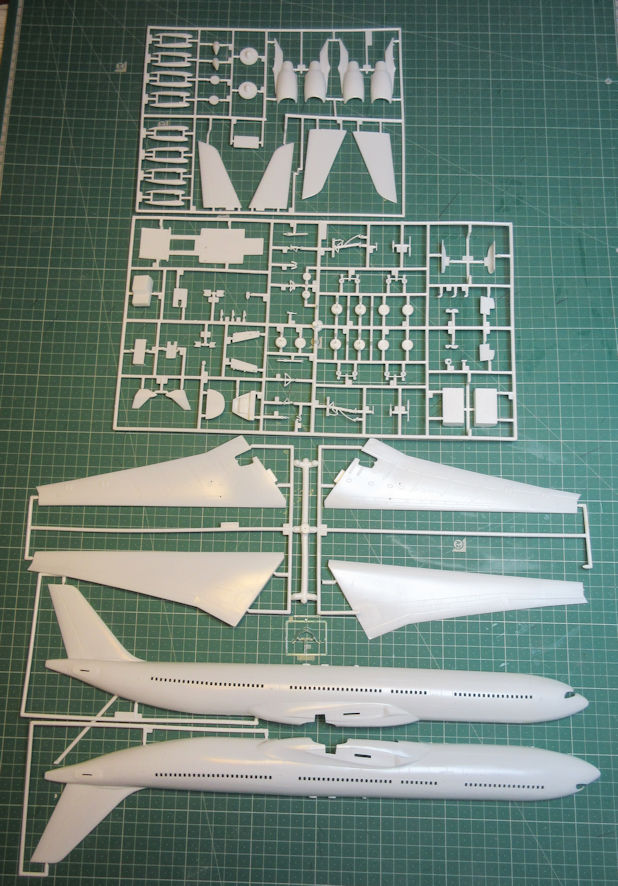
There are three basic components to most airliner models, the fuselage, the wings and the engines. My method of working has evolved so that I usually tackle the work in two pasts, the engines and the airframe (fuselage and wings) but a problem which we will come to later makes if convenient to make the three components separately this time.
The fuselage (part 1)
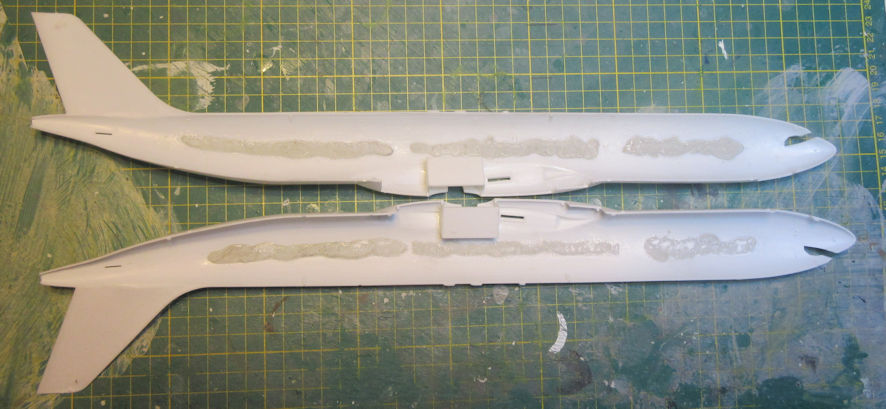
A beginner to the airliner modelling process will be faced with several problems in making these kits. One is whether to fill in the windows and use decals instead, another is fitting the cockpit windows and perhaps the largest is the seam down the middle of the fuselage where the two halves meet. In these old Revell kits the latter is made more difficult because their age and the thinness of the mouldings means it is quite difficult to get the fuselage halves to line up easily, leaving daunting differences between the heights of the two halves. For three of these models which are to become A.330-200s, there is also the process of shortening the fuselages and replacing the tail fin.

For me the work began with cutting the tail fins off the fuselages halves of three of the kits. Even since somebody in our local club pointed out to me that using the reverse side of a modelling blade is a much better way of cutting through the plastic than using the cutting side, because doing it that way virtually scribed its way through the plastic and takes much less energy and is more accurate. That is what I did with the tails, cutting them right off at the base.
When I made my first A.330s in the mists of time I retained the windows provided in the kit but since then I’ve taken to filling them and using decals for the windows instead. I reckon that, in 1/144 decals look better than the alternative which is trying to fill in the windows with something to simulate clear windows because it is virtually impossible to make all the windows look the same. There are as many ways to fill the windows as there are modellers and my method is to use the Selley’s Knead It two part epoxy putty rolled out into long sausages and pushed through the window holes from the inside so that a little bit is extruded on the outer side. The putty is quick setting and if you pick just the right moment as it sets all you have to so is run your knife along slicing off the tops of each little knob right at the level of the fuselage side. If you get this just right there will be no need to do any more filling of the windows. Because this epoxy putty does not form a real bond with the fuselage plastic and flexing of the plastic, especially on long parts like fuselage halves, can cause the epoxy to pop out, I usually run some thin CA glue along the join of the epoxy and plastic to make sure that doesn’t happen.
It is convenient to take care of the cockpit windows at this stage because they are a real curse in Revell airliner kits. The kit instructions tell you to try to slip them into place after the fuselage halves are joined but that is much easier said than done and if the window doesn’t disappear into the hole, never to emerge again, it is almost impossible to get it to line up in the hole as accurately as is necessary. The simple solution is to cut the window in half at the leading edge and then glue each half into the fuselage halves, and if you do it accurately nobody will ever know that you cut the window in half in the first place.
There is more to be done before the fuselage halves can be joined. Most importantly is the weight for the nose to prevent the model from being a tail-sitter. Before putting in the nose weight it is necessary to make and instal the nose undercarriage bay and upper parts of the nose undercarriage leg and glue them into one of the fuselage halves, the same side as where the weight will go. Then the undercarriage bay is set in place installing some weight is simplicity itself. Knead up a large dollop of epoxy putty, wrap it around a large weight – I use lead fishing weights – and push it into the fuselage half which has the undercarriage bay. To ensure that the other fuselage half wills still fit make sure it is wet and push the two halves together. If it is wet enough the putty won’t stick to the wet half and you can easily separate the two halves with the putty in the other nose half conforming to the shape of the other half so there will be no problem in gluing the halves together later.
After you’ve done this it is also necessary to fill the gaping holes where the tails used to be on the three kits that are going to become A.330-200s. I do this with another generous blob of epoxy putty so that it will be a strong anchor for the new aftermarket tails when it is sets. Doing this is the same as putting in the nose weights, press the putty into one side, dampen the other half and then push them together.
When all this work is done and set it’s time to glue the two fuselages halves together. If you are a miracle modellers you will be able to do this with the two fuselage halves lined up perfectly, but I’m not one of them. It occurred to me later that some of the trouble I had in joining the halves accurately might be overcome by sticking little flanges into one of the fuselage halves which might then force the halves to line up better, but I didn’t think of doing that until it was too late.

All I can say is that I worked as carefully as I could but the joint between the two fuselage halves in all five models ended up in a pitiful state. A lot of filling and sanding will be required, but let’s deal with that later.

I’m also gonna start an Airbus A330-200! I’ve taken some tips from this post for my future project! I would love to see the rest of the WIP of these projects! I also have some questions about the tail, so if you could help me also it would be great!
LikeLike
Thanks Diogo, I hope your build goes well. Life has been hectic around here for the past few months so I have yet to post the second part of my write up on the A330. I hope to get to it in the coming week or two. From my point of view the Revell A330s are not difficult to make so long as you get the fuselage length and the tail right for the -200s. You could enlarge the tail yourself but I bought mine (since I am making two or three -200s) from Airliner Hobby Supplies. The main thing I had to keep in mind was getting the right engines for the airlines I am modelling. Good luck and I’d like to see a photo of how it is going. – Leigh
LikeLike